Blog Archive
- Nov 05 (1)
- Nov 03 (1)
- Nov 02 (1)
- Oct 31 (1)
- Oct 30 (1)
- Oct 25 (1)
- Oct 21 (1)
- Oct 17 (1)
- Oct 15 (1)
- Oct 14 (1)
- Oct 13 (3)
- Oct 12 (1)
- Oct 11 (1)
- Oct 10 (1)
- Oct 03 (1)
- Sep 25 (1)
- Sep 24 (1)
- Sep 23 (1)
- Sep 22 (2)
- Sep 19 (1)
- Sep 18 (2)
- Sep 17 (1)
- Sep 12 (1)
- Sep 10 (2)
- Sep 09 (1)
- Sep 07 (2)
- Sep 05 (1)
- Sep 04 (1)
- Sep 03 (2)
- Sep 02 (1)
- Sep 01 (1)
- Aug 29 (1)
- Aug 25 (1)
- Aug 23 (1)
- Aug 20 (1)
- Aug 14 (1)
- Aug 10 (1)
- Aug 08 (2)
- Aug 05 (1)
- Aug 04 (3)
- Aug 02 (1)
- Jul 24 (1)
- Jul 22 (1)
- Jul 21 (1)
- Jul 08 (1)
- Jul 05 (1)
- Jun 13 (1)
- Jun 11 (1)
- Jun 08 (1)
- Jun 05 (1)
- Jun 02 (1)
- May 18 (1)
- May 17 (1)
- May 15 (1)
- May 12 (2)
- May 07 (2)
- May 06 (1)
- May 04 (1)
- May 03 (2)
- Apr 29 (1)
- Apr 26 (1)
- Apr 25 (2)
- Apr 22 (2)
- Apr 14 (3)
- Apr 10 (1)
- Apr 09 (1)
- Apr 08 (1)
- Apr 06 (1)
- Apr 05 (1)
- Apr 04 (1)
- Apr 01 (2)
- Mar 31 (2)
- Mar 30 (1)
- Mar 28 (1)
- Mar 24 (2)
- Mar 23 (3)
- Mar 22 (1)
- Mar 19 (1)
- Mar 17 (1)
- Mar 12 (1)
- Mar 11 (1)
- Mar 10 (4)
- Mar 09 (1)
- Mar 08 (1)
- Mar 05 (2)
- Mar 04 (1)
- Mar 03 (2)
- Mar 02 (1)
- Feb 29 (2)
- Feb 28 (1)
- Feb 21 (2)
- Feb 19 (2)
- Feb 17 (1)
- Feb 15 (1)
- Feb 13 (1)
- Feb 12 (2)
- Feb 11 (2)
- Feb 10 (2)
- Feb 09 (3)
- Feb 05 (2)
- Feb 04 (1)
- Feb 01 (5)
- Jan 31 (1)
Facebook Badge
followers
Powered by Blogger.
Popular Posts
Monday, September 3, 2012
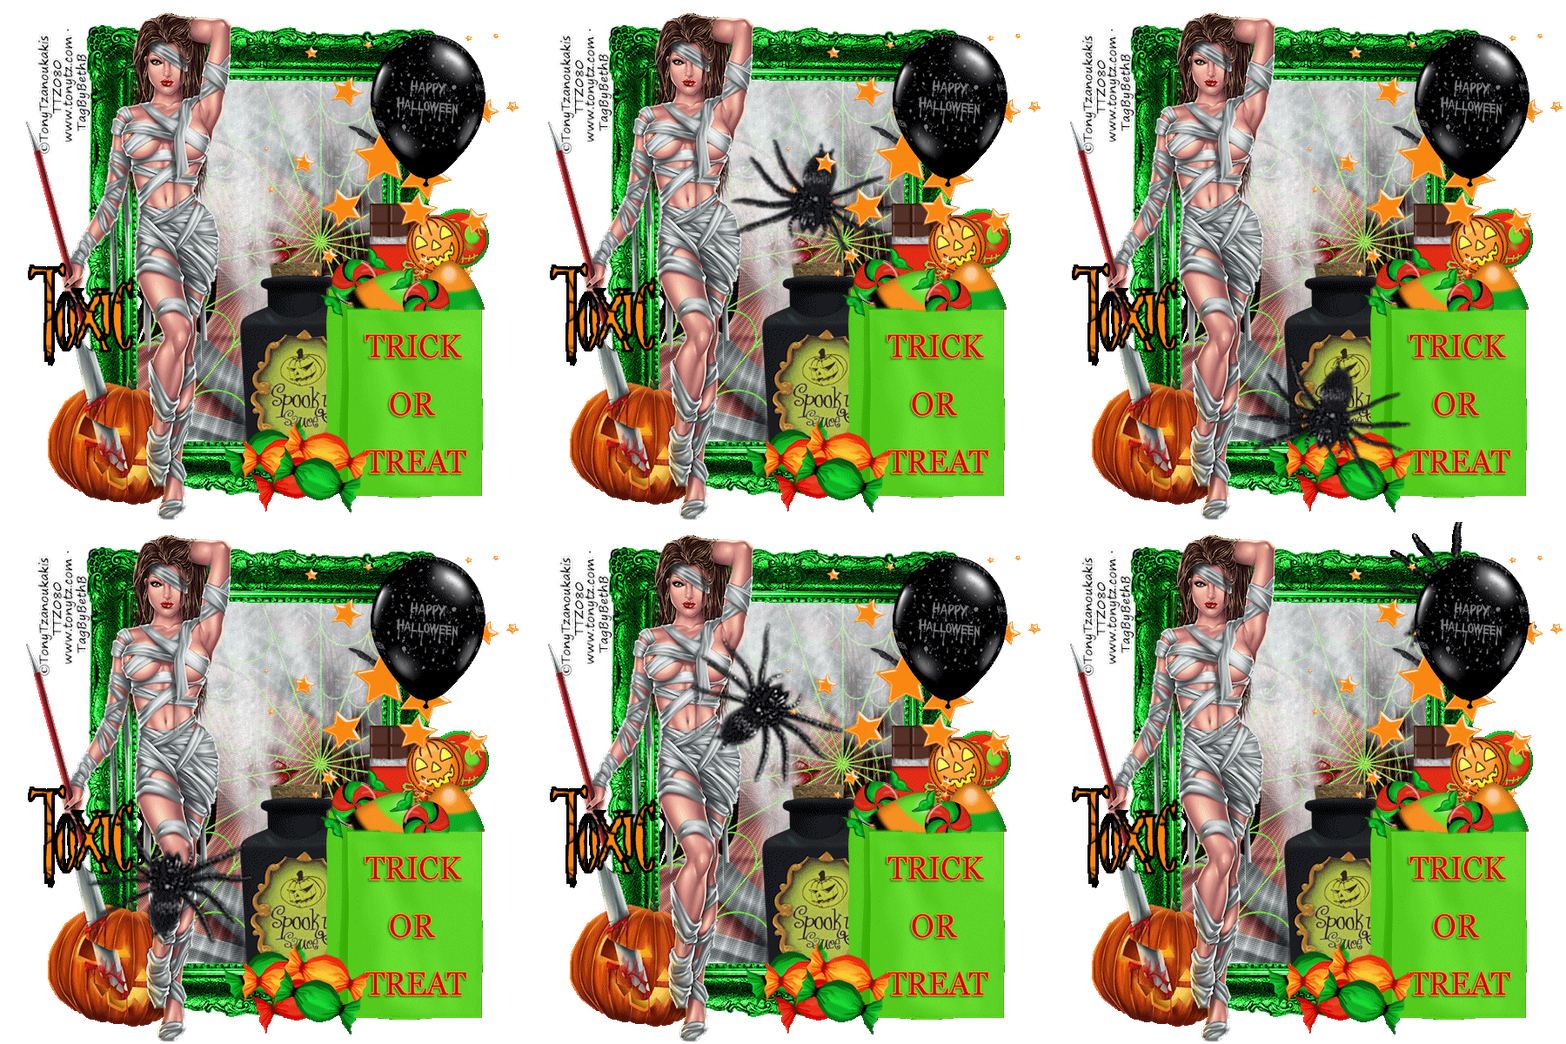
Trick or Treat
This tutorial is my creation & any resemblemces to others is purely accidental
Written by ToxicTutorialz on 9.3.12 in PSPX2
Any version should work
Do Not Claim as Your own
Link Back to My Blog
Remember to SAVE Often!!!
Written by ToxicTutorialz on 9.3.12 in PSPX2
Any version should work
Do Not Claim as Your own
Link Back to My Blog
Remember to SAVE Often!!!
Version of PSP
PTU Tube
by Tony Tz
by Tony Tz
Plugin used
DSB Flux/Spiderweb
DSB Flux/Spiderweb
AnimationShop
COPY/PASTE=C/P when used
AnimationShop=AS when used
AnimationShop=AS when used
Open a 600 x 600 blank image
Pull frame2 into psp
Image Free Rotate Rotate right by 90
Resize to 90%
Use magicwand to select center of frame
Pull spiderweb into psp
C/P as new layer Line up inside frame
Move web layer below frame layer
Selections Invert Delete DO NOT DESELECT YET!!!
C/P your closeup tube as new layer
Place behind web
Move tubelayer below frame and web layers
Change opacity layer to 68
Select None
Effects Plugins dsb flux/spiderweb Apply the below settings
Rays 70 Rings 54 Merge 85 Click ok
C/P your main tube as new layer
Resize to 70% if same tube is used
Place on left side
Pull bag2 into psp
Paste & resize to 60% Place on lower right side
Bring all sweets ,chocolate & lollipops into psp
C/P each one as new layers
Resize as necessary
Place in bag using eraser to erase any overhang
Now thats out of the way let's continue lol
Pull stars, bottle, balloon and spider into psp
C/P Stars as new layer
Place on right side of frame
Now c/p the balloon as new layer
Resize to 45% Place on right side on stars
C/P the bottle as new layer
Place at bottom behind candy
C/P the spider as new layer
Resize to 40% Place in top right corner
Make sure your spiderlayer is below stars and balloon layers
Add your copywrite at this point
Pull paper2 into psp
Set your BG on p2,FG on Black
Font on Nightmare 5 Size 48 B=Bold Stroke 2
Type out your name Convert to raster layer
Place where you like best
Open animation shop
Jump up to your spider layer Close it off for now
Edit Copy Merged Paste into AS as New Animation
Back to psp
Open spider layer
Edit Copymerged Paste into AS after Current Frame
Back to psp
Move your spider out so that its in view
Edit CopyMerged Paste into AS after CurrentFrame
Back to psp
Move your spider down the frame just a bit while using your picktool to turn slightly
Edit CopyMerged Paste into AS after CurrentFrame
Back to psp
Repeat the above steps using the picktool and moving the spider
Make sure each time you take into AS
You should end up with the spider back where you started
I ended up with 25 frames in Animationshop
Move your slider all the way back to 1st frame
Edit Select All Animation Frame Properties Set speed to 35
View your animation and save as gif

Labels:
PTU.Tuts
Subscribe to:
Post Comments (Atom)
About Me
♥My T.O.U♥
♥Tutorial T.O.U♥
The tutorials are from my own creation & what you make from them are yours but please DO NOT use my tutorials for monetary gain or to make money from.
I love writing tutorials to guide and teach you.
Please DO NOT hotlink anything from this blog.
You may share my tutorials in your groups with my permission. I am allowed to join any group that my tutorials are being shared with.
Tuts wrote for Nov
- DevilishDezines-
- Scraps Dimensions
- Addictive Pleasures-
My Stalker Hits
Labels
PTU.Tuts
(112)
FTU.Tuts
(10)
SneakPeeks
(3)
Templates
(3)
FTU Elements
(2)
News
(2)
Tag Showoffs
(2)
Blinkie Tut
(1)
BlogTrains
(1)
FTU
(1)
FTU Previews
(1)
Moving tutorials
(1)
New Blog Layout
(1)
Tutorial Previews
(1)
ftu tags
(1)


0 comments:
Post a Comment