My Avatars

Facebook Badge
followers
Popular Posts


Saturday, August 4, 2012
Spotlite
This tutorial is my creation & any resemblemces to others is purely accidental
Written by ToxicTutorialz on 8.4.12 in PSPX2
Any version should work
Do Not Claim as Your own
Link Back to My Blog
Written by ToxicTutorialz on 8.4.12 in PSPX2
Any version should work
Do Not Claim as Your own
Link Back to My Blog
Remember to SAVE Often!!!
Version of PSP
AnimationShop-AS
Mask2 by Nicole
at Creative Misfits Creations
at Creative Misfits Creations
Time & Patience on this tutorial
Lets get started with a 600 x 600 blank image
Floodfill with black
Pull P10 into psp
C/P as new layer
Apply your mask from disk
Merge mask group
Duplicate twice
Use your Change to target tool and on original star mask
BG Color #8440a6
Color your star
ON 1st duplicate BG Color #ca0b74
Last duplicate BG Color #138edf
Paste your tube and place on left side at bottom
Pull E37 into psp & paste
Pull E11 into psp Image Mirror
Paste as new layer Position behind your tube
Use my tag above for guidance
Pull E4 into psp
Resize to 75% Place on upper right corner
Pull E24 into psp & Paste
Add other elements you may like
I used the skull and musicnotes
Add a new layer above your starwire layer
I added a flare from my psp tubes and placed on the purple spotlight
Then add a new layer and place flare on the pink spotlight
Do this once more for blue spotlight making sure u add new layer
You can find a flare by googling it
Add your copywrite
Pull p4 or one of choice into psp
Set as BG FG on Null
Font set on TOXIA sIZE14
Type out your name
Add a gradient glow of 3.00 color Pink
Repeat gradientglow but change color to white
Convert to raster layer
Now Close off colored star layers and flare layers for now
Edit Copymerged
Paste as new Animation in AS
Back to psp
Open Coloredstar1 layer and flare1 layer
Should be the purple star
Edit CopyMerged
Paste after currentlayer in AS
Back to psp
Repeat the above steps til you have all star/flare layers in psp
You should end up with 4 frames total
In AS go to edit select all Animation Frame Properties
Change speed to 25
View animation
Save as gif
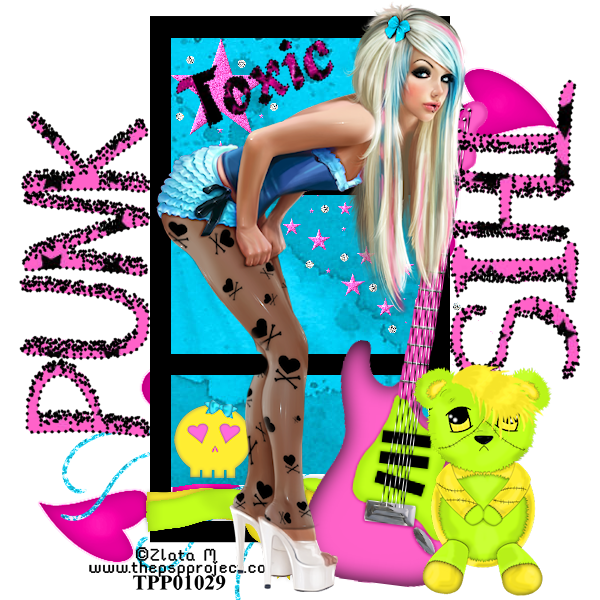
Punk This
This tutorial is my creation & any resemblemces to others is purely accidental
Written by ToxicTutorialz on 8.2.12 in PSPX2Any version should work
Do Not Claim as Your ownLink Back to My Blog
Remember to SAVE Often!!!
PTU Kit
Punk Rawkby DarlinsCreations
PTU Tube
by Zlataat ThePSPProject
Font used
What A Messat fontspace.com
Open a 600 x 600 blank image/canvas
Pull frame1 into pspPaste as new layer onto canvas
Use magicwand to select center of frames
Pull paper5 or one of choice into psp
C/P paper as new layer onto frames
Selections Invert Delete Deselect
Paste your tube
Resize to 85% Place in center of frames
Use eraser to erase bits of her bck leg toward the bottom
We want her legs to be straddled the frame
Pull guitar fo choice into psp
Paste & Place on right side beside your tube
Pull bear into psp
Paste & resize to 45%
Place beside guitar
Pull Hearts into psp
Paste as new layer
Move this layer below all layers
Pull stars into psp
Paste
Resize to 45% Place inside top frame
Use eraser to erase any overhang on right side
Add other elements of choice if you like
Add your copywrite
Pull paper4 into psp
Set your font on "what a mess" size 24
BG set on your paper FG set on black
Type out PUNK Convert to raster layer
Image Free Rotate Rotate 90 left
Place on left side and line up with frame
Repeat typing the word THIS Convert to raster
Image Rotate Free Rotate 90 right
Place and line up on the right side of frame
Pull paper9 into psp sET AS bg
Set font to TOXIA size 16 TYPE out your name
Resize to 45%
Convert to raster layer Place where you like
mERGE ALL visible and save as PNG
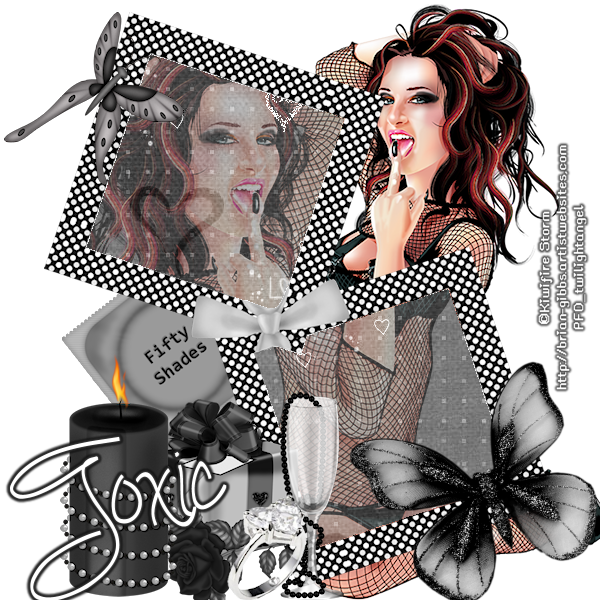
Sexual Healin
This tutorial is my creation & any resemblemces to others is purely accidental
Written by ToxicTutorialz on 8.2.12 in PSPX2
Written by ToxicTutorialz on 8.2.12 in PSPX2
Any version should work
Do Not Claim as Your own
Link Back to My Blog
Remember to SAVE Often!!!
Version of PSP
Open a 600 x 600 blank image/canvas
Pull E38 into psp
Copy/Paste as new layer
Resize to 90%
Position in center of canvas
Pull P7 into psp or one of your liking
Use magicwand to select center of frames
C/P your paper as new layer
Selections Invert Delete
Move paper layer below frame layer
Now select bottom frame with magicwand
C/P your tube as new layer
Position the bottom half of tube in bottom frame
Selections Invert Delete
Repeat the above steps for top of tube and top frame
Set your blendmode to softlight
Now pull the following Elements into psp
E9,E11,E14,E22,E29 & E32
C/P E9 as new layer
Resize to 45% Place on left side & Move this layer below all layers
C/P E14 as new layer
Place at bottom on left side Resize as neceassary
Paste E22
Place at bottom beside the candle Resize as necessary
Now repeat with E11 Position at bottom in front of candle and rose
Now paste your last 2 remaining elements which are the butterflies
Place butterfly29 on bottom frame corner and repeat with butterfly32
Place this Element on left side of top frame
Last but not least lol Paste your tube once more and place on right side behind frames
Resize to 75%
Add your copywrite
Set your font on Simply Glamorous Size 24 BG Grey FG Null
Type out your name Convert to raster
Place where you like best
Add a gradient glow of 3.00 color dark grey
Apply gradient glow again using black as the color
Merge all visible and save as png
Subscribe to:
Comments (Atom)
LinkWithin
About Me

Grab My Blinkies


I CT for


Script Tester 4

My Stalker Hits
Blogs I stalk