My Avatars

Facebook Badge
followers
Popular Posts


Saturday, April 14, 2012
Pampered
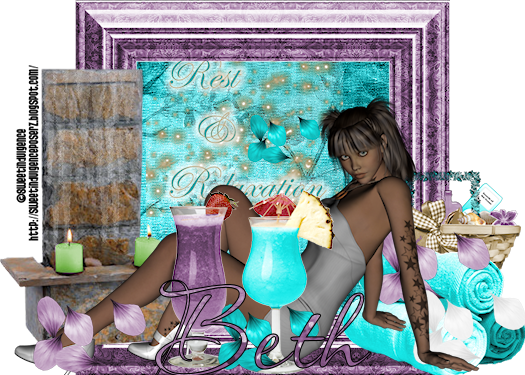
This tutorial was written by BethB on 4.14.12 and is my own creation
Any resemblences to other tutorials is purely accidental
Any resemblences to other tutorials is purely accidental
Written in PSP X2
Any version should work
Do Not Claim as Your Own
Link Back to My Blog
Any version should work
Do Not Claim as Your Own
Link Back to My Blog
Tools Needed
Font used
PassionsConflict
PassionsConflict
Let's Get Going
Open a 700 x 500 blank image
Drag frame4 into psp
Paste as new layer & resize to 80%
Drag pp2 into psp
Select the center of frame with magicwand
C/P the paper as new layer
Selections Invert Delete Deselect
Drag wordart1 into psp
Paste as new layer and place inside frame
You need to resize down to 70%
Now c/p your poser tube as new layer
I used the one thats sitting
Place at bottom in fron to frame
Drag towels,giftbasket1,spafountain,and flowerpetals into psp
COPY & Paste the towels onto image as new layer
Resize to 65% Place on right bottom side behind poser
Paste the giftbasket as new layer and resize to 65%
Place behind towels on right bottom side
Now Paste the spafountain as new layer
Place on left side
Move spa layer below your tube layer on layer palette
Drag drinks into psp and paste
Resize down to 55%
Place at bottom in center towards the left
Now paste your flowerpetals and resize them all to 55%
Place them around the bottom where you like best
Paste the rainfall as new layer on your spafountain
Place at the top of your spa
Duplicate and place under the first one
Add your copywrite
Drag Pp6 into psp
Set PP6 as your BG FG Null
Font set as PassionsConflict Size 26
Type out your name
Convert to raster layer
Place at bottom
Merge all visible
Image Resize to 75% Make sure all layers is ticked
Save as png
CatsMeow

This is an exclusive tutorial to ScrapsandtheCity
This Tutorial was written by BethB on 4.14.12 and is my own creation
Any resemeblences to other tutorials is purely accidental
Was written in PSP X2
Any version should work
Do Not Claim as Your Own
Link Back to My Blog
Any version should work
Do Not Claim as Your Own
Link Back to My Blog
Tools Needed
Mask89
By DBV
I do not know where I got this
if it's yours please email me
By DBV
I do not know where I got this
if it's yours please email me
Let's get started
Open a 700 x 500 blank image
Drag frame3 into psp
Resize to 70%
Paste your tube as new layer
If you used the same tube a sme resize to 55%
Resize again to 90%
Place in center of frame
Drag Ribbon1 into psp
Copy/Paste as new layer
Resize to 75%
Place on right side under frame
Drag bow2 & Beads into psp
Paste bow
Resize down to 65%
Place on ribbon on the top
Now paste the beads
Place on bow,You may need to resize
Drag Ipod into psp
Paste & Resize to 70%
Depending on what side your poser is on
Paste the ipod on the opposite side
Drag Sparkles2 into psp
Paste as new layer
Place on the side your ipod is on
Bring the candies into psp
Paste and resize down to 45%
Place at the bottom beside the ipod
Drag Meow into psp
Paste
Resize dow to 55%
Place on your poser's leg
Drag a paper of choice into psp
Paste as new layer
Drag it down to the bottom of layer palette
but above the blank layer
but above the blank layer
Apply your mask layer by going to
Layers Mask Layer From Image
Right Click on Mask Layer in LAYER pALETTE
AND MERGE GROUP
AND MERGE GROUP
Add other elements you may like
BG to Paper6 FG wHITE
Font set on PussyCat Size 30
Type out your name
Convert to Raster Layer
Place at the bottom on right side
Grab your Picktool
Using control arm and Push Up
Same settings as above
Type Out Cats Meow
Convert to raster
Place inside frame
Resize to 65%
Add copywrite
Merge All Visible
Save as png
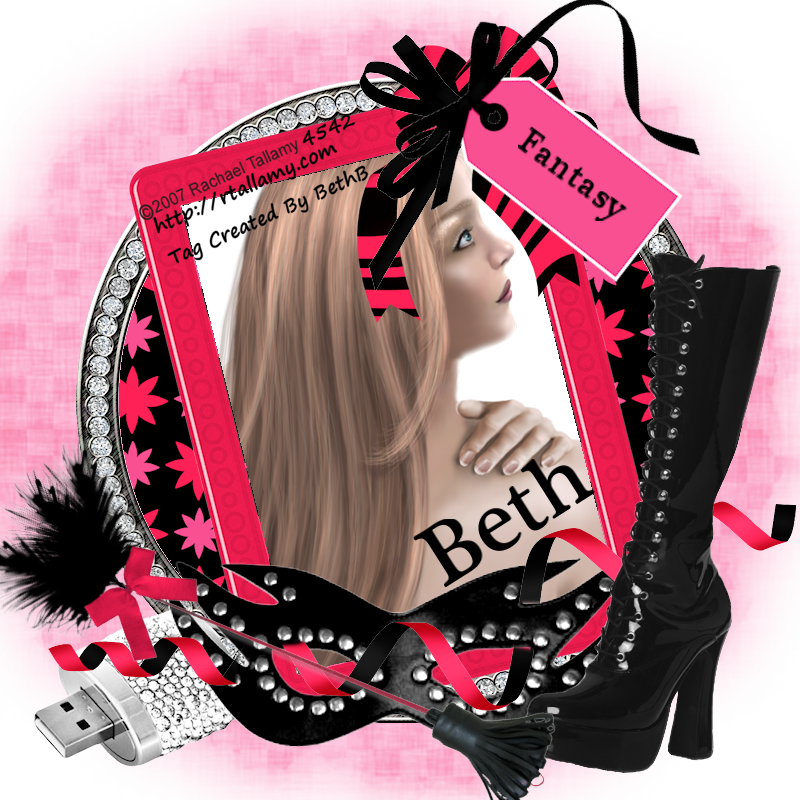
Fantasy
This tutorial was written by BethB on 4.14.12 and is my own creation
Any resemblences to other tutorials is purely accidental
Any resemblences to other tutorials is purely accidental
Was written in PSPX2
Any version should work
Do Not Claim as Your Own
Link Back to My Blog
Any version should work
Do Not Claim as Your Own
Link Back to My Blog
Tools Needed
Font called
Plantagenet Cherokee
Plantagenet Cherokee
Mask 362
By Weescottslass
By Weescottslass
Let's Begin with an 800 x 800 blank image
Drag elements 51 & 52 into psp
Copy/Paste both frames onto your image
Grab your magicwand and select the center of the circle frame
Drag paper 9 into psp
C/P paper as new layer
Selections Invert Delete
Move paper below your circle frame layer
Deselect
Repeat the above steps using paper15 for your rectangle frame
Make sure you move your paper below this frame layer
While still selected
C/P your tubes as new layer
Delete and then deselect
Move your tube layer below your frame layer
Drag Elements 41 & 59 into psp
Paste element 41 as new layer
Place at bottom of frames
Paste Element 59 as new layer
Resize to 75%
Place on the top right side on corner of frame
Drag Element 58 into psp
Paste as new layer & resize to 55%
Place on top of element 59
I then dragged Element 10 into psp
Pasted & Resized to 60%
Place on right side on top of black ribbon bow
Use your picktool using control arm to push up just a bit
Drag Element 40 into psp
Paste and place at bottom in center
Use your eraser to erase bits of the ribbon
Make it look like its going in and out fo mask
Paste other elements of choice & Place them around your main image
I used the boot,frenchtickler,and usb
Add your copywrite
Drag paper of choice into psp
C/P as new layer
Drag to the bottom ony our layer palette
Layers Mask Layer From Image
Apply your mask
Right click on mask layer and merge group
Resize mask to 125%
Change the opacity to 62
Set your BG to Black FG Null
Font set to Plantagenet Cherokee Size 12
Type out Fantasy Convert to raster
Place on the tag
Use your picltool again using control arm
Pull down
Type out your name
Place where you like best
Merge all visible
Save as png
Subscribe to:
Comments (Atom)
LinkWithin
About Me

Grab My Blinkies


I CT for


Script Tester 4

My Stalker Hits
Blogs I stalk