My Avatars

Facebook Badge
followers
Popular Posts


Friday, September 7, 2012
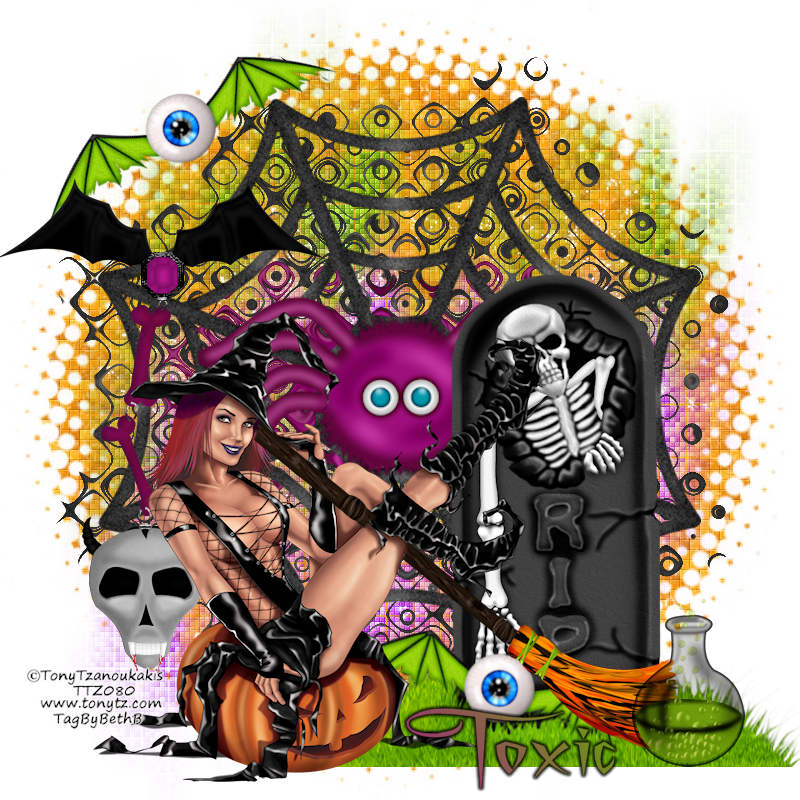
Curse On You
This tutorial is my creation & any resemblemces to others is purely accidental
Written by ToxicTutorialz on 9.7.12 in PSPX2
Written by ToxicTutorialz on 9.7.12 in PSPX2
Any version should work
Do Not Claim as Your own
Link Back to My Blog
Do Not Claim as Your own
Link Back to My Blog
Remember to SAVE Often!!!
Version of PSP
Plugin/dsb flux/bubbles
Version of PSP
Plugin/dsb flux/bubbles
PTU Tube-Miss Halloween
TonyTz-Purchase Here
TonyTz-Purchase Here
Mask7 & Mask2 by CandyTreats
Download Here
Download Here
Font - A Charming Font
anywhere on the net
Open a 600 x 600 blank canvas
Pull paper11 into psp
C/P as new layer
Apply your candytreats mask from Image Invert Mask Data ticked Click ok
Move up toward top just a little
Duplicate Image Mirror
Adjust Hue & Sat Colorize to purple
Pull paper9 into psp and paste as new layer
Apply Mask2 Click ok
Move this mask layer below other 2 mask layers
Pull E31 AND 40 into psp
C/P E40 as new layer and bring this layer to the top of other layers
C/P E31 as new layer
Duplicate
On original apply the dsb flux/bubbles plugin with the following setttings
11,32,49,28 Click ok
Open your duplicate if it was closed
Pull E19 into psp Paste on canvas
Place on bottom right side of web
Next paste your tube as new layer and resize to 60%
Place on bottom left side toward the middle
Pull E11 into psp
Paste and resize to 40% Place where you like best and duplicate
Pull E24 into psp and paste
Bring to bottom of canavas next to your tube
Now use eraser size 16 and erase bits of the broom on her leg and face
Add other elements that you may like
I added E29 AND 17.
Add your copywrite
Font on A Charming Font Size 24 BG on color from tube FG on color from tube
Change BG to gradient Type out your name Convert to raster
Place at bottom
Merge all visible and save

Witchy_HallowNight
This tutorial is my creation & any resemblemces to others is purely accidental
Written by ToxicTutorialz on 9.7.12 in PSPX2
Any version should work
Do Not Claim as Your own
Link Back to My Blog
Remember to SAVE Often!!!
Version of PSP
Written by ToxicTutorialz on 9.7.12 in PSPX2
Any version should work
Do Not Claim as Your own
Link Back to My Blog
Remember to SAVE Often!!!
Version of PSP
Plugins-MM/Copies
VM Toolbox/CrystalBall/shower
VM Toolbox/CrystalBall/shower
AnimationShop
A Charming Font SuperExtended
Here
Here
Copy/paste=C/P when needed
AnimationShop=AS when needed
AnimationShop=AS when needed
Open a 600 x 600 blank canvas
Pull paper12 into psp
C/P as new layer Resize to 55%
Effects Plugins VM Toolbox CrystallBall with below settings
61,34,231,120,130, 105, 5, 144 Click Ok
Edit Copymerged Paste into AS as new animation
Back to PSP
Apply CrystalBall again with these settings
160,202,159,194,120,165,34,144
Edit Copymerged Paste into AS after current frame
Back to PSP
Apply CrystallBall once more with these settings
216,44,28,64,124,8,162,53 Click ok
Edit Copymerged Paste into AS after current frame
Edit Select All Animation Frame Properties Set Speed to 55
Minimize AS for now
Back to PSP
Open a new 600 x 600 blank canvas
Set your BG on #f75709 FG on Null
Preset shape on star2
Draw out a medium size star
Place in center of canvas
Set your BG on #8600ca
Draw out a small star and place above the medium star
Now duplicate your small star 7 times and place around medium star
Merge your star layers visible
Add a noise of 55 gausian monochrome both ticked
Effects Plugins MuraMeisters/Copies/Shower with the below settings
Shower, 28 Default on remaining Click ok
Move to the top just a little Duplicate Flip Move to the right just a bit and line up
Pull element 8 & element 38 into psp
C/P element 8 as new layer Resize to 60% Place on left side of canvas
Now paste element 38 as new layer & resize to 55%
Place on right side of canvas toward the bottom
Pull elements 16 & 62 into psp
C/P element 62 as new layer Resize to 45% Place on the tombstone
Now paste element 16 as new layer Resize to 40% Place on tombstone
Duplicate twice and resize to 60% Place at bottom on tombstone
Pull elements 9,19,and 65 into psp
Paste Element19 as new layer Resize to 45% Place on lower left side of canvas
Paste element 9 as new layer Resize to 60% place in center at bottom
C/P your tube as new layer Resize to 60%
Place above your cauldron
BG set on #8600ca FG on #d24a14
Font on A Charming Font Size 18
Type out your name Convert to raster Place where you like best
Now add your copywrite
Edit Copymerged Paste into AnimationShop
Now we need 3 copies
On the top toolbar hit your middle clipboard icon twice
Edit Select All Copy
Jump onto crystalball frames
Edit Select All Paste into select frame
Edit Select All Animation View
Save as gif
Subscribe to:
Comments (Atom)
LinkWithin
About Me

Grab My Blinkies


I CT for


Script Tester 4

My Stalker Hits
Blogs I stalk