Blog Archive
- Nov 05 (1)
- Nov 03 (1)
- Nov 02 (1)
- Oct 31 (1)
- Oct 30 (1)
- Oct 25 (1)
- Oct 21 (1)
- Oct 17 (1)
- Oct 15 (1)
- Oct 14 (1)
- Oct 13 (3)
- Oct 12 (1)
- Oct 11 (1)
- Oct 10 (1)
- Oct 03 (1)
- Sep 25 (1)
- Sep 24 (1)
- Sep 23 (1)
- Sep 22 (2)
- Sep 19 (1)
- Sep 18 (2)
- Sep 17 (1)
- Sep 12 (1)
- Sep 10 (2)
- Sep 09 (1)
- Sep 07 (2)
- Sep 05 (1)
- Sep 04 (1)
- Sep 03 (2)
- Sep 02 (1)
- Sep 01 (1)
- Aug 29 (1)
- Aug 25 (1)
- Aug 23 (1)
- Aug 20 (1)
- Aug 14 (1)
- Aug 10 (1)
- Aug 08 (2)
- Aug 05 (1)
- Aug 04 (3)
- Aug 02 (1)
- Jul 24 (1)
- Jul 22 (1)
- Jul 21 (1)
- Jul 08 (1)
- Jul 05 (1)
- Jun 13 (1)
- Jun 11 (1)
- Jun 08 (1)
- Jun 05 (1)
- Jun 02 (1)
- May 18 (1)
- May 17 (1)
- May 15 (1)
- May 12 (2)
- May 07 (2)
- May 06 (1)
- May 04 (1)
- May 03 (2)
- Apr 29 (1)
- Apr 26 (1)
- Apr 25 (2)
- Apr 22 (2)
- Apr 14 (3)
- Apr 10 (1)
- Apr 09 (1)
- Apr 08 (1)
- Apr 06 (1)
- Apr 05 (1)
- Apr 04 (1)
- Apr 01 (2)
- Mar 31 (2)
- Mar 30 (1)
- Mar 28 (1)
- Mar 24 (2)
- Mar 23 (3)
- Mar 22 (1)
- Mar 19 (1)
- Mar 17 (1)
- Mar 12 (1)
- Mar 11 (1)
- Mar 10 (4)
- Mar 09 (1)
- Mar 08 (1)
- Mar 05 (2)
- Mar 04 (1)
- Mar 03 (2)
- Mar 02 (1)
- Feb 29 (2)
- Feb 28 (1)
- Feb 21 (2)
- Feb 19 (2)
- Feb 17 (1)
- Feb 15 (1)
- Feb 13 (1)
- Feb 12 (2)
- Feb 11 (2)
- Feb 10 (2)
- Feb 09 (3)
- Feb 05 (2)
- Feb 04 (1)
- Feb 01 (5)
- Jan 31 (1)
Facebook Badge
followers
Powered by Blogger.
Popular Posts
Friday, March 23, 2012
Beauty Queen
This Tutorial was written by BethB & is my own creation
Any resemblences to other tutorials is purely accidental
Any resemblences to other tutorials is purely accidental
Was written in PSPX2
Any version should work
Do not Claim as Yours
Link Back to My Blog
Tube used by
VeryMany @ PFD
VeryMany @ PFD
Font used
SnappyScript Light
SnappyScript Light
Let's Begin
Delete the watermark
Floodfill all layers using different papers from kit
On your top smaller frame
Use magicwand to select the original layer
Copy/Paste your closeup tube as new layer
Don't cover the whole frame with tube
Selections Invert Delete Deselect
Repeat for bottom Frame
Change Blendmode to Luminance(L)
On top tube change blendmode to Screen
Paste your main tube as new layer
Resize to 55% Place where you like best
Bring cherries into psp
Paste on canvas
Resize to 45%
Place on your wordart
Bring Glitter into PSP
Paste & Place where you like
Bring Strings into psp
Paste as new layers & place them where you like
Bring Star1 into psp
Paste as new layer
Move over to the left
Move this layer above top frame layer but below bottom frame layer
Refer to my tag above
Bring StarChain into psp
Paste as new layer
Resize to 65% Place on left side
Add a small dropshadow
Bring Perfume into psp
Paste
Resize to 55%
Place on bottom right side
Use eraser to erase bits of strin that overlaps
I also used the screw and resized to 55%
Place inbetween the 2 smaller frames
Bring Martini,Bubbles,Sparkles into psp
Paste Martini as new layer
Place over on left side
Paste bubbles & resize to 55%
Place above martini
Now paste the sparkles and place them where you like
Set your font to SnappyScript Light
Size 30
BG Black FG Null
Type out your name
Convert to Raster
Place on top left side
Add copywrite
Merge all visible & Save as png

Labels:
PTU.Tuts
|
0
comments
Beauty Queen Template
I made this Template in PSP X2 and I'm also using it n a tutorial
Its 700 x 500
Hope you can use it for your projects
Love to see what you come up with..
Download HERE

Labels:
Templates
|
0
comments
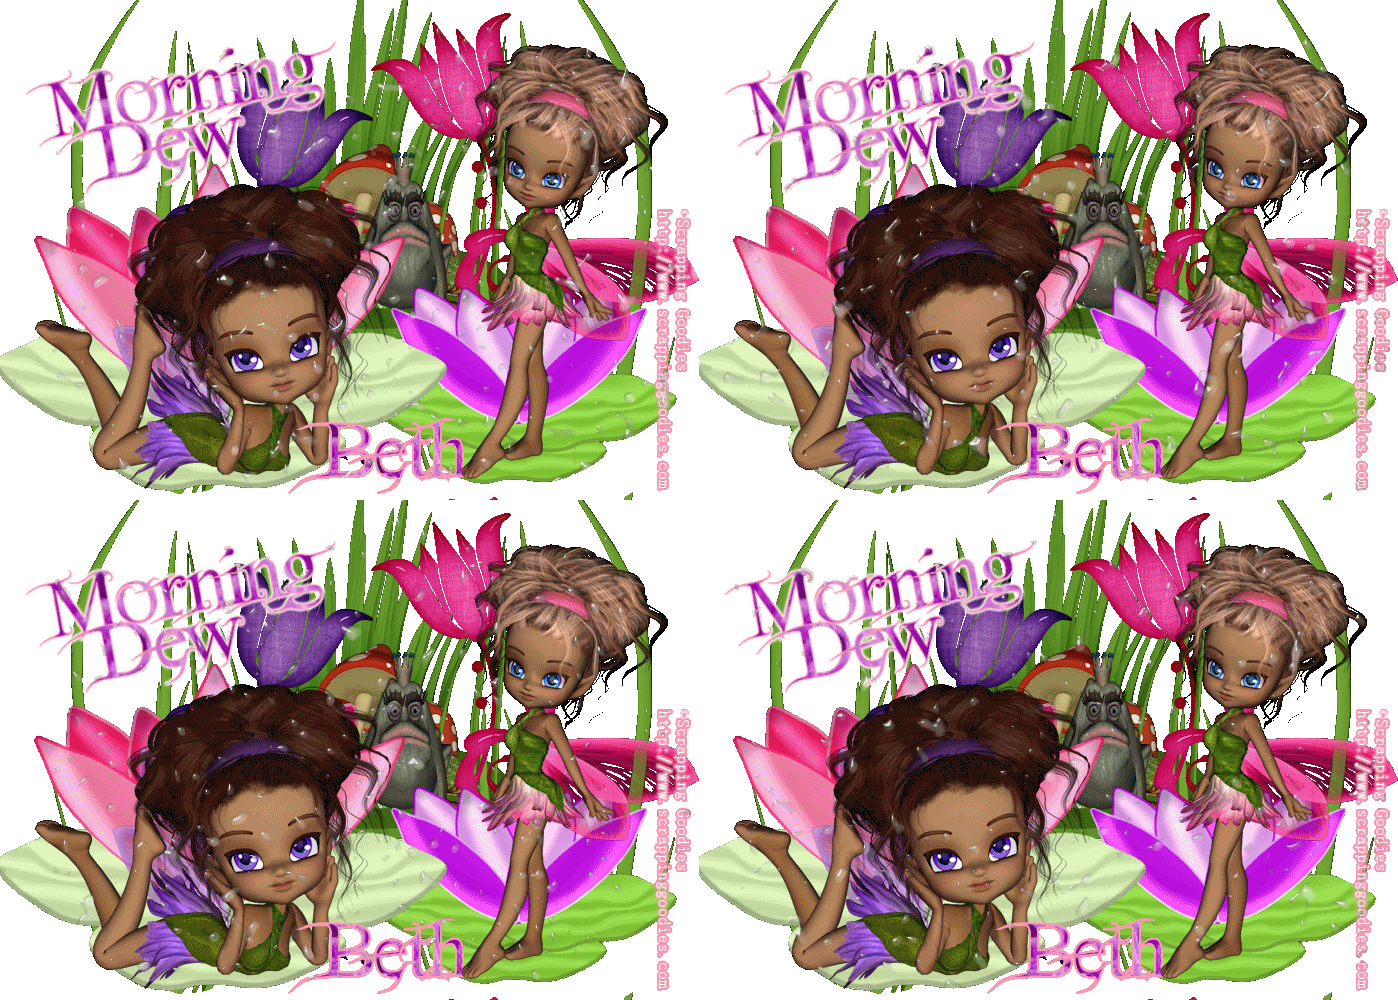
MorningDew
This Tutorial was written by BethB on 3.23.12 & is my own creation
Any resemblences to other tutorials is purely accidental
Any resemblences to other tutorials is purely accidental
Was written in PSPX2
Any version should work fine
Do Not Claim as your Own
Link Back to My Blog
Any version should work fine
Do Not Claim as your Own
Link Back to My Blog
Tools Needed
AnimationShop
Plugin
EC4/Waterdrops
EC4/Waterdrops
Font
FairyDust dafont.com
FairyDust dafont.com
Let's Get Started
Open a 700 x 500 blank image
Bring the following elements & fairies into psp
grass,feaprop16,lilypad1,lilypad2,glassflower1 & 2,Leelee5 & liliay6
Paste the feaprop as new layer & resize to 60%
Place in center toward the top just a bit
Now paste the grass and resize to 60%
Place on the left side of image
Duplicate - Image-Mirror
Copy & Paste lilypad2 as new layer
Resize to 65% Place on bottom left side
Now repeat pasting lilypad1 but place on bottom right
Resize to 55%
Copy & Paste Glassflower 2 as new layer
Place on left side
Move flowerlayer below your lilypad layer
Repeat above steps with Glassflower1
Place on right side
Now C/P the fairies and place Leelee on the bottom left
Place Liliay on the bottom right side
You will need to image- mirror them both
Use eraser to get rid of any overhang from bottom
Bring frog into psp
Paste on image as new layer
Resize to 25%
Place on mushroom
Set font to FairyDust-
S 30,
B=Bold-
LineStyle-Solid-
BG PAPER3
FG #ff9bb5
S 30,
B=Bold-
LineStyle-Solid-
BG PAPER3
FG #ff9bb5
Type out Name
Convert to RasterLayer
Place at bottom
Using the same settings as above
Type out MorningDew
Convert to RasterLayer
Place at the top where you like
Add your copywrite
Open Animationshop
Effects-Plugins-EC4-waterdrops with the settings listed below
13.73
20
50
80
50
80
Color-white
Seed 4112
Edit-Copymerged-Paste into Animationshop
As New Animation
Back to psp
Edit Hit Undo waterdrops
Apply Same Plugin Set Seed to 7542
Edit Copymerged Paste into AS after currentframe
Back to psp
Edit Hit undo again
Apply Plugin again
Set seed to 2801
Edit CopyMerged Paste into AS AFTER CURRENTFRAME
BACK TO PSP
Hit undo
Reapply with the seed set to 2012
Paste into AS after currentframe
Edit Select All Animation FrameProperties
Change speed to 40
Save as gif

Labels:
PTU.Tuts
|
0
comments
Subscribe to:
Comments (Atom)
About Me
♥My T.O.U♥
♥Tutorial T.O.U♥
The tutorials are from my own creation & what you make from them are yours but please DO NOT use my tutorials for monetary gain or to make money from.
I love writing tutorials to guide and teach you.
Please DO NOT hotlink anything from this blog.
You may share my tutorials in your groups with my permission. I am allowed to join any group that my tutorials are being shared with.
Tuts wrote for Nov
- DevilishDezines-
- Scraps Dimensions
- Addictive Pleasures-
My Stalker Hits
Labels
PTU.Tuts
(112)
FTU.Tuts
(10)
SneakPeeks
(3)
Templates
(3)
FTU Elements
(2)
News
(2)
Tag Showoffs
(2)
Blinkie Tut
(1)
BlogTrains
(1)
FTU
(1)
FTU Previews
(1)
Moving tutorials
(1)
New Blog Layout
(1)
Tutorial Previews
(1)
ftu tags
(1)


