My Avatars


Facebook Badge
followers
Popular Posts


Saturday, November 3, 2012
Colors of Fall

This tutorial is my creation & any resemblences to others is purely accidental
Written by ToxicTutorialz on 11.3.12 in PSPX2
Any PSP version should work
Do Not Claim as Your own
Link Back to My Blog
Remember to SAVE Often!!!
PTU Kit called Shadowy Fall by DevilishDezines
Buy it Here
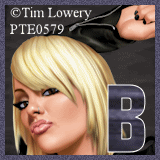
PTU Tube by KeithGarvey which was purchased at PTE (Now Closed)
Buy his tubes at personal store GarvsGirls
Font used Colors of Autumn grab it at fontspace.com
AnimationShop
Written by ToxicTutorialz on 11.3.12 in PSPX2
Any PSP version should work
Do Not Claim as Your own
Link Back to My Blog
Remember to SAVE Often!!!
PTU Kit called Shadowy Fall by DevilishDezines
Buy it Here
PTU Tube by KeithGarvey which was purchased at PTE (Now Closed)
Buy his tubes at personal store GarvsGirls
Font used Colors of Autumn grab it at fontspace.com
AnimationShop
Open a 700 x 700 blank image
Bring frame 7 & 8 into psp
Copy & Paste frame 8 as new layer & resize to 75%
Now c/p frame7 as new layer and resize to 80%
Position on top of frame 8
Bring paper2 into psp
Use magicwand to select center of frame7
Paste your paper as new layer
Selections Invert Delete Deselect
Move paper layer below both frame layers
C/P tube as new layer
I used a tube that has a middle closeup
Move your tube layer to the top of all layers
Use your eraser tool to erase any overhang on bottom
Bring Elements 32,36,39, 42, and 89 into psp
Copy/Paste element 89 as new layer
Resize to 55% Place on bottom left side
Paste element 39 as new layer
Resize to 40% and then again to 55%
Place over on bottom left side in front of element 89
Paste element 42 as new layer
Resize to 45% and position around the bottom of image
Duplicate and pull over just a bit
Duplicate once more and mirror
Paste element 36 and resize to 55%
Place at bottom and over to the right just a bit
Now paste element 32 and resize to 45% and place on corner of bench on right side
Now bring elements 7,13,52,60,62,80, & 83
Paste element 62 as new layer and resize to 35%
Place on the log
Paste element 80 and resize to 45% place on bench
Paste element 83 and resize to 45%
Place on left side behind log & pumpkin but in front of barrel
Paste element 52 as new layer
Resize to 40% and place on bottom left side of log
Duplicate element 52 and move this layer below log layer
C/P your remaining elements and resizing them to 30 to 35%
Position them around the bottom of your image til you are satisified
I also pasted element 52 and resized to 35%
Place on left side on bench
Add your copywrite
Set your BG on paper8 FG on #e08400
Font on Colors of Autumn Size 24 Type out your name and convert to raster
Place where you like best
Selections Select All Float Defloat Modify Expand by 4 Add new layer
floodfill with #e08400
Deselect
Merge the 2 name layers down
Edit Copymerged Paste as new animation in Animationshop
Back to psp
Jump on your leaf frame layer
Go to adjust Hue & Sat Colorize with these settings: H 20 Sat 255 Click ok
Edit Copymerged Paste after currentframe in Animationshop
Back to psp
Reapply the Hue & Sat but this time change to 30 and 255 Click ok
Paste into animationshop after currentframe
Back to psp & apply same effect but this time change to 15 and 255 Click
Paste after currentframe in animationshop
In animationshop
EDIT Select All Animation FrameProperties Set Speed to 40
View Animation & Save

Friday, November 2, 2012
Timeless PuppyLove

This tutorial is my creation & any resemblences to others is purely accidental
Written by ToxicTutorialz on 11.2.12 in PSPX2
Written by ToxicTutorialz on 11.2.12 in PSPX2
Any PSP version should work
Do Not Claim as Your own
Link Back to My Blog
Remember to SAVE Often!!!
Do Not Claim as Your own
Link Back to My Blog
Remember to SAVE Often!!!
PTU Kit called ByGone Times by DevilishDezines
Buy it Here
PTU Tube by KeithGarvey which was purchased at MPT (now closed)
Buy his tubes at personal store GarvsGirls
Font used A Charming Font dafont.com
Buy it Here
PTU Tube by KeithGarvey which was purchased at MPT (now closed)
Buy his tubes at personal store GarvsGirls
Font used A Charming Font dafont.com
Let's begin by bringing frame 3 into psp
Resize to 85%
Bring Element11 into psp
Paste Element 11 as new layer and move below frame
Next bring Elements 30 & 76 from elements1 folder
Paste Element 30 as new layer and resize to 45%
Place on right side on frame
Now paste element 76 as new layer and resize to 65%
Place on left upper corner on frame
C/P your tube as new layer and resize if neccesary
Place on lower left side
Bring elements 2, 43 ,46, 50, 83 98
Copy & Paste element 50 as new layer and resize to 55%
Place at the bottom of frame on right side of tube
Now apste element 43 as new layer and resize to 40%
Move letters layer below dog layer on layer palette
C/P the clock element on image
Resize to 55% and place on frame and move this layer below frame layer
Now paste remaining elements and place the way you like best or refer to my tag above.
Add your copywrite
Set your foreground to a color from frame and background to black
Font set on A Charming Font Size 24 Type out your name Convert to raster
Place at bottom below your dog element
Now switch your color palettes and close off the black
Change font to Allura or one fo choice and type out Timeless Puppy Love
Convert to raster layer and place at the top fo your image
Merge all visible and resize all layers to 85% and save.
Subscribe to:
Posts (Atom)
LinkWithin
About Me

Grab My Blinkies


I CT for


Script Tester 4

My Stalker Hits
Blogs I stalk