My Avatars


Facebook Badge

followers

Popular Posts


Thursday, April 5, 2012
Sinful Love

This Tutorial was written by BethB on 4.5.12 and is my own creation
Any resemblences to other tutorials is purely accidental
Any resemblences to other tutorials is purely accidental
Written in PSPX2
Any version should work
Any version should work
Do Not Claim as your Own
Link Back to My Blog
Tools Needed
Mask 89
BY dbv
If this is yours please email me so that I can credit you
BY dbv
If this is yours please email me so that I can credit you
Let's get started
Open a 700 x 700 blank canvas
Drag element10 into psp
Paste as new layer
Place in center of canvas
Use magicwand to select center of frame
Drag Element8 into psp
Copy/Paste as new layer over frame
Selections Invert Delete
Drag Element16 into psp
Paste as new layer
Move to the top inside frame
Deselect
Move these layers below your frame layer
Drag PP4 into psp
Paste as new layer & move to bottom of all layers
Apply your mask
Right click on mask layer and merge group
Resize to 110%
Use magicwand once more to select center of frame
Paste your closeup half tube as new layer
Selections Invert Delete Deselect
Move this below your cloud layers
Paste your main tube as new layer
Place on elft side of frame
Drag Element12 into psp
Paste & Place at the bottom
Drag Element7 into psp
Paste & Place at bottom in center
Drag Elements 24 & 25 into psp
Paste element 25 as new layer
Resize to 60%
Place on left side on frame
Paste element 24 as new layer
Image Free Rotate Rotate 90 left
Move ribbon layer below the bow layer
Drag Element1 into psp
Paste & Place on top of bow
Resize if necessary
Now drag other elements you like into psp
I used Elements 4,9,15 & 29
Resize to your liking
Place at bottom the way you like
Add your copywrite
Drag PP3 into psp
Set as your BG FG White
Font set as RudeMetal Size 14
Type out Sinful Love
Convert to raster
Selections Select All Modify Expand by 3
Add new layer Floodfill with white
Selections Select None
Move this layer below the original
Type out your name
Convert to raster
Place at bottom
Repeat the same steps above as we did for the Sinful Love
Merge all visible
Save as png

Wednesday, April 4, 2012
Play with Me
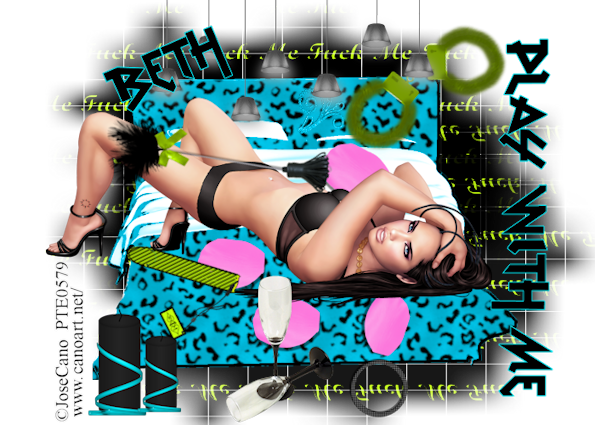
This Tutorial was written by BethB on 4.4.12 and is my own creation
Any resemblences to other tutorials is purely accidental
Any resemblences to other tutorials is purely accidental
Written in
PSPX2
Any version should work
Do Not Claim as Your Own
Link back to My Blog
Tools Needed
Tube By
JoseCano @ PTEPlease purchase a license before using any tubes
JoseCano @ PTEPlease purchase a license before using any tubes
Font called
vtks Rude Metal @ Fontspace.com
vtks Rude Metal @ Fontspace.com
Let's Begin with a 700 x 500 blank canvas
From the elements folder
Drag Bed into psp
Paste as new layer
Position in center
You can either change color or leave as is
I changed mine by going to adjust Hue & Sat Colorize
Drag the lights into psp
Copy/Paste
Position at the top of the bed
Drag the petals into psp
C/P as new layer
Place on bed and resize to 65%
If you are using the same tube
Paste as new layer and place on bed
Drag candle2 into psp
Paste as new layer
Resize to 55%
Place on bottom left side
Duplicate & place beside the first candle
Drag glasses,handcuffs,cockring,vibrater,@rope into psp
Paste rope as new layer
Place on your tubes hands
Resize to 40%
Use eraser to any thats showin on her face..
Paste handcuffs & resize to 50%
Place at top corner of bed
Paste the frenchtickler Place across your tubes belly
Paste the vibrater and place on left corner of the bed
Paste remaining elements and resize as necessary
Place at bottom..
Add your copywrite
Jump down to very bottom layer
Drag Paper11 INTO PSP
Copy & Paste as new layer
Have your mask in psp
Layers New Mask From Image
Apply your mask
On layer palette
Right click on mask layer & merge group
Duplicate your mask & flip
Set your font Rude Metal Size 18 BG to Black FG to color of choice
Type out Play with Me Convert to raster
Image Free Rotate Rotate by 90 right
Place on right side
Type out your name
Place at top
Merge all visible
Resize all to 85% Making sure resize all layers is ticked
Subscribe to:
Posts (Atom)
LinkWithin

About Me

Grab My Blinkies


I CT for


Script Tester 4

My Stalker Hits

Blogs I stalk

