My Avatars


Facebook Badge

followers

Popular Posts


Monday, November 5, 2012
WildFlowers

This tutorial is my creation & any resemblences to others is purely accidental
Written by ToxicTutorialz on 11.5.12 in PSPX2
Written by ToxicTutorialz on 11.5.12 in PSPX2
Any PSP version should work
Do Not Claim as Your own
Link Back to My Blog
Remember to SAVE Often!!!
Do Not Claim as Your own
Link Back to My Blog
Remember to SAVE Often!!!
PTU Kit called ElegantlyYours by DevilishDezines
Buy it Here
PTU Tube by Alex Prihodko
Buy it at PFD
Font used called Allura
Download it from dafont.com
Buy it Here
PTU Tube by Alex Prihodko
Buy it at PFD
Font used called Allura
Download it from dafont.com
Let's begin with bringing Frame4 into psp
Open a 600 x 600 blank image
Copy & Paste Frame4 a snew layer onto image
Resize to 75% if still too large resize again to 85%
Bring paper9 into psp
Use magicwand to select center of frame
Selections Modify Expand by 6
C/P paper as new layer over frame Invert Delete Deselect
Move paper layer below frame layer
Bring element 79 into psp
C/P as new layer onto image
Resize to 35% Place at the top on frame
Bring some of the flower elements into psp from both element folders
they can be of your choice-I used elements 83,90,50,73,71,88,80, and and 57
Resize each of them and place inside the frame at bottom-refer to my tag above as an example
Bring element 66 into psp
C/P as new layer and resize to 35%
Place on left side at the bottom inside frame
Next bring elements 37,and 43 into psp
C/P the chair as a new layer Resize to 55% and place over on right side at bottom of image
Paste your tube and resize to 45% and place on chair
Now paste element 43 and resize to 40% and place in front of chair
Now paste element 50 as new layer and resize to 35%
Place on table
Finaly bring the remaining elements 52,59,62 and 100 into psp
Copy & Paste element 59 as new layer and resize to 40%
Place over on bottom left side
Paste element 100 as new layer and resize same as before
Place on smaller table on left side
Now paste element 62 and resize to 35% place on corner of chair
Finally paste the boot and resize as before and place on bottom elft side beside table
Add your copywrite
Set BG to paper 6 and FG to #e3b68e Font set on Allura size 24 stroke 1
Type out your name and convert to raster
Place where you like and save as png
Open a 600 x 600 blank image
Copy & Paste Frame4 a snew layer onto image
Resize to 75% if still too large resize again to 85%
Bring paper9 into psp
Use magicwand to select center of frame
Selections Modify Expand by 6
C/P paper as new layer over frame Invert Delete Deselect
Move paper layer below frame layer
Bring element 79 into psp
C/P as new layer onto image
Resize to 35% Place at the top on frame
Bring some of the flower elements into psp from both element folders
they can be of your choice-I used elements 83,90,50,73,71,88,80, and and 57
Resize each of them and place inside the frame at bottom-refer to my tag above as an example
Bring element 66 into psp
C/P as new layer and resize to 35%
Place on left side at the bottom inside frame
Next bring elements 37,and 43 into psp
C/P the chair as a new layer Resize to 55% and place over on right side at bottom of image
Paste your tube and resize to 45% and place on chair
Now paste element 43 and resize to 40% and place in front of chair
Now paste element 50 as new layer and resize to 35%
Place on table
Finaly bring the remaining elements 52,59,62 and 100 into psp
Copy & Paste element 59 as new layer and resize to 40%
Place over on bottom left side
Paste element 100 as new layer and resize same as before
Place on smaller table on left side
Now paste element 62 and resize to 35% place on corner of chair
Finally paste the boot and resize as before and place on bottom elft side beside table
Add your copywrite
Set BG to paper 6 and FG to #e3b68e Font set on Allura size 24 stroke 1
Type out your name and convert to raster
Place where you like and save as png

Saturday, November 3, 2012
Colors of Fall

This tutorial is my creation & any resemblences to others is purely accidental
Written by ToxicTutorialz on 11.3.12 in PSPX2
Any PSP version should work
Do Not Claim as Your own
Link Back to My Blog
Remember to SAVE Often!!!
PTU Kit called Shadowy Fall by DevilishDezines
Buy it Here
PTU Tube by KeithGarvey which was purchased at PTE (Now Closed)
Buy his tubes at personal store GarvsGirls
Font used Colors of Autumn grab it at fontspace.com
AnimationShop
Written by ToxicTutorialz on 11.3.12 in PSPX2
Any PSP version should work
Do Not Claim as Your own
Link Back to My Blog
Remember to SAVE Often!!!
PTU Kit called Shadowy Fall by DevilishDezines
Buy it Here
PTU Tube by KeithGarvey which was purchased at PTE (Now Closed)
Buy his tubes at personal store GarvsGirls
Font used Colors of Autumn grab it at fontspace.com
AnimationShop
Open a 700 x 700 blank image
Bring frame 7 & 8 into psp
Copy & Paste frame 8 as new layer & resize to 75%
Now c/p frame7 as new layer and resize to 80%
Position on top of frame 8
Bring paper2 into psp
Use magicwand to select center of frame7
Paste your paper as new layer
Selections Invert Delete Deselect
Move paper layer below both frame layers
C/P tube as new layer
I used a tube that has a middle closeup
Move your tube layer to the top of all layers
Use your eraser tool to erase any overhang on bottom
Bring Elements 32,36,39, 42, and 89 into psp
Copy/Paste element 89 as new layer
Resize to 55% Place on bottom left side
Paste element 39 as new layer
Resize to 40% and then again to 55%
Place over on bottom left side in front of element 89
Paste element 42 as new layer
Resize to 45% and position around the bottom of image
Duplicate and pull over just a bit
Duplicate once more and mirror
Paste element 36 and resize to 55%
Place at bottom and over to the right just a bit
Now paste element 32 and resize to 45% and place on corner of bench on right side
Now bring elements 7,13,52,60,62,80, & 83
Paste element 62 as new layer and resize to 35%
Place on the log
Paste element 80 and resize to 45% place on bench
Paste element 83 and resize to 45%
Place on left side behind log & pumpkin but in front of barrel
Paste element 52 as new layer
Resize to 40% and place on bottom left side of log
Duplicate element 52 and move this layer below log layer
C/P your remaining elements and resizing them to 30 to 35%
Position them around the bottom of your image til you are satisified
I also pasted element 52 and resized to 35%
Place on left side on bench
Add your copywrite
Set your BG on paper8 FG on #e08400
Font on Colors of Autumn Size 24 Type out your name and convert to raster
Place where you like best
Selections Select All Float Defloat Modify Expand by 4 Add new layer
floodfill with #e08400
Deselect
Merge the 2 name layers down
Edit Copymerged Paste as new animation in Animationshop
Back to psp
Jump on your leaf frame layer
Go to adjust Hue & Sat Colorize with these settings: H 20 Sat 255 Click ok
Edit Copymerged Paste after currentframe in Animationshop
Back to psp
Reapply the Hue & Sat but this time change to 30 and 255 Click ok
Paste into animationshop after currentframe
Back to psp & apply same effect but this time change to 15 and 255 Click
Paste after currentframe in animationshop
In animationshop
EDIT Select All Animation FrameProperties Set Speed to 40
View Animation & Save
Friday, November 2, 2012
Timeless PuppyLove

This tutorial is my creation & any resemblences to others is purely accidental
Written by ToxicTutorialz on 11.2.12 in PSPX2
Written by ToxicTutorialz on 11.2.12 in PSPX2
Any PSP version should work
Do Not Claim as Your own
Link Back to My Blog
Remember to SAVE Often!!!
Do Not Claim as Your own
Link Back to My Blog
Remember to SAVE Often!!!
PTU Kit called ByGone Times by DevilishDezines
Buy it Here
PTU Tube by KeithGarvey which was purchased at MPT (now closed)
Buy his tubes at personal store GarvsGirls
Font used A Charming Font dafont.com
Buy it Here
PTU Tube by KeithGarvey which was purchased at MPT (now closed)
Buy his tubes at personal store GarvsGirls
Font used A Charming Font dafont.com
Let's begin by bringing frame 3 into psp
Resize to 85%
Bring Element11 into psp
Paste Element 11 as new layer and move below frame
Next bring Elements 30 & 76 from elements1 folder
Paste Element 30 as new layer and resize to 45%
Place on right side on frame
Now paste element 76 as new layer and resize to 65%
Place on left upper corner on frame
C/P your tube as new layer and resize if neccesary
Place on lower left side
Bring elements 2, 43 ,46, 50, 83 98
Copy & Paste element 50 as new layer and resize to 55%
Place at the bottom of frame on right side of tube
Now apste element 43 as new layer and resize to 40%
Move letters layer below dog layer on layer palette
C/P the clock element on image
Resize to 55% and place on frame and move this layer below frame layer
Now paste remaining elements and place the way you like best or refer to my tag above.
Add your copywrite
Set your foreground to a color from frame and background to black
Font set on A Charming Font Size 24 Type out your name Convert to raster
Place at bottom below your dog element
Now switch your color palettes and close off the black
Change font to Allura or one fo choice and type out Timeless Puppy Love
Convert to raster layer and place at the top fo your image
Merge all visible and resize all layers to 85% and save.
Resize to 85%
Bring Element11 into psp
Paste Element 11 as new layer and move below frame
Next bring Elements 30 & 76 from elements1 folder
Paste Element 30 as new layer and resize to 45%
Place on right side on frame
Now paste element 76 as new layer and resize to 65%
Place on left upper corner on frame
C/P your tube as new layer and resize if neccesary
Place on lower left side
Bring elements 2, 43 ,46, 50, 83 98
Copy & Paste element 50 as new layer and resize to 55%
Place at the bottom of frame on right side of tube
Now apste element 43 as new layer and resize to 40%
Move letters layer below dog layer on layer palette
C/P the clock element on image
Resize to 55% and place on frame and move this layer below frame layer
Now paste remaining elements and place the way you like best or refer to my tag above.
Add your copywrite
Set your foreground to a color from frame and background to black
Font set on A Charming Font Size 24 Type out your name Convert to raster
Place at bottom below your dog element
Now switch your color palettes and close off the black
Change font to Allura or one fo choice and type out Timeless Puppy Love
Convert to raster layer and place at the top fo your image
Merge all visible and resize all layers to 85% and save.
Wednesday, October 31, 2012
Sofisticated

This tutorial is my creation & any resemblences to others is purely accidental
Written by ToxicTutorialz on 10.31.12 in PSPX2
Any PSP version should work
Do Not Claim as Your own
Link Back to My Blog
Remember to SAVE Often!!!
PTU Kit called VictorianMeadow by DevilishDezigns
Buy it Here
PTU Tube by Serg Grafik
Buy it at SATC
Written by ToxicTutorialz on 10.31.12 in PSPX2
Any PSP version should work
Do Not Claim as Your own
Link Back to My Blog
Remember to SAVE Often!!!
PTU Kit called VictorianMeadow by DevilishDezigns
Buy it Here
PTU Tube by Serg Grafik
Buy it at SATC
Plugin EC4 jIGGLE
Animationshop
Font used Some Weatz Symbols
dafont,com
dafont,com
Let's start with bringing Frame3 & Paper7 into psp
Use magicwand to select center of frame
Selections Modify Expand by 7
Copy & Paste Paper as new layer Invert and Delete
Move paper below your frame layer on layer palette
Bring element64 into psp and paste as new layer
Place on right side on frame
Bring element84 into psp & paste onto image
Resize to 55% & place at bottom on right side on frame
Bring elements 1, 7, & 70 into psp
Copy & Paste element 1 as new layer Place at bottom
Move fan alyer below your bouquet layer
Next paste element 70 and resize to 40%
Place around your bouquet
I duplicated and then moved below the bouquet layer
I then pasted element 7 and resized to 35% and place near the bouquet
Jump back upto your frame layer
Copy & Paste your tube as new layer
Center the way you like best
Now use your eraser to erase any parts of tube thats on frame
Bring Elements 22,53 and 91 into psp
Paste element 53 as new layer and resize to 50%
Place on right side on frame
Now paste element 22 and place at the top corner of frame
Paste element 91 as new layer and resize to 50% place on key
Next bring elements 49,56,80 and 82 into psp
Paste them as new layers and resize as necessay
Place around the bottom as you like or you can refer to my tag above as an example
Add your copywrite
BG set on paper9 FG null Font on Some Weatz Size 20
Type out your name and convert to raster layer
Place on fan
Jump onto candle layer
Use freehand selection tool and make a selection around the flame
Apply the EC4/Jiggle effect with the settings listed below
Turbulence 9.46 4.65 20 Seamless tile ticked Seed 1210 Click ok
Deselect Edit Copymerged Paste as new animation in aniamtionshop
Back to psp
Hit undo twice
Reapply the plugin except hit seed twice
Deselect Paste into animationshop after currentframe
Back to psp Hit undo twice
Repeat plugin again hitting seed twice
Deselect Edit Copymerged Paste into aniamtionshop after currentframe
Back to psp Hit undo twice
Repeat plugin once more hitting seed twice
Deselect and Edit Copymerged
Paste into animationshop after currentframe
You should have total of 4 frames in animationshop
Edit Select All Animation Frame Properties Set speed to 40 and view and save
Use magicwand to select center of frame
Selections Modify Expand by 7
Copy & Paste Paper as new layer Invert and Delete
Move paper below your frame layer on layer palette
Bring element64 into psp and paste as new layer
Place on right side on frame
Bring element84 into psp & paste onto image
Resize to 55% & place at bottom on right side on frame
Bring elements 1, 7, & 70 into psp
Copy & Paste element 1 as new layer Place at bottom
Move fan alyer below your bouquet layer
Next paste element 70 and resize to 40%
Place around your bouquet
I duplicated and then moved below the bouquet layer
I then pasted element 7 and resized to 35% and place near the bouquet
Jump back upto your frame layer
Copy & Paste your tube as new layer
Center the way you like best
Now use your eraser to erase any parts of tube thats on frame
Bring Elements 22,53 and 91 into psp
Paste element 53 as new layer and resize to 50%
Place on right side on frame
Now paste element 22 and place at the top corner of frame
Paste element 91 as new layer and resize to 50% place on key
Next bring elements 49,56,80 and 82 into psp
Paste them as new layers and resize as necessay
Place around the bottom as you like or you can refer to my tag above as an example
Add your copywrite
BG set on paper9 FG null Font on Some Weatz Size 20
Type out your name and convert to raster layer
Place on fan
Jump onto candle layer
Use freehand selection tool and make a selection around the flame
Apply the EC4/Jiggle effect with the settings listed below
Turbulence 9.46 4.65 20 Seamless tile ticked Seed 1210 Click ok
Deselect Edit Copymerged Paste as new animation in aniamtionshop
Back to psp
Hit undo twice
Reapply the plugin except hit seed twice
Deselect Paste into animationshop after currentframe
Back to psp Hit undo twice
Repeat plugin again hitting seed twice
Deselect Edit Copymerged Paste into aniamtionshop after currentframe
Back to psp Hit undo twice
Repeat plugin once more hitting seed twice
Deselect and Edit Copymerged
Paste into animationshop after currentframe
You should have total of 4 frames in animationshop
Edit Select All Animation Frame Properties Set speed to 40 and view and save
Tuesday, October 30, 2012
Lost&Broken

This tutorial is my creation & any resemblences to others is purely accidental
Written by ToxicTutorialz on 10.25.12 in PSPX2
Written by ToxicTutorialz on 10.25.12 in PSPX2
Any PSP version should work
Do Not Claim as Your own
Link Back to My Blog
Remember to SAVE Often!!!
Do Not Claim as Your own
Link Back to My Blog
Remember to SAVE Often!!!
PTU Kit called DarkSecrets & City of Despair by DevilishDezigns
Buy it Here
FTU Tube by SoaLee
you can get it here
Buy it Here
FTU Tube by SoaLee
you can get it here
(Her site currently under construction)
Font used called Always * Forever
Grab it at fontspace.com
ToxicPoisonTemplate
Grab it Here
Font used called Always * Forever
Grab it at fontspace.com
ToxicPoisonTemplate
Grab it Here
Lets begin with the template
Delete the copywrite
Jump up onto the raster7 layer
Pull element 73 into psp and paste as new layer
Resize to 75%
Add a dropshadow of 3 3 40 20 black Click ok
Repeat same dropshadow again
Move this layer below raster3 layer but above raster2 layer
Jump back upto your raster 7 layer
Pull frame3 into psp and paste
Resize to 85 % and line up with raster7
Pull element96 into psp and paste as new layer
Line in center of frame and resize to 75% Image Mirror realign
Use eraser to erase bottom of stalk
Pull element2 into psp and paste
Place on left side on black rectangle
Resize to 75%
On your layer palette move lantern layer below your bush layer
Pull paper12 into psp
Jump onto copy of raster layer 5 and with magicwand select it
Copy/Paste your paper as new layer and invert DO NOT DESELECT YET
Paste a image of a cityscene as new layer and hit delete Deselect
( I am using the city image from DEVILISHDEZIGNS PTU KIT CITY OF Despair)
(Buy CityofDespair HERE)
Repeat for copy2 of raster 6 layer
Pull element33 into psp and paste
Resize to 65% and place over on the left just a bit
Refer to my tag above for placement
Paste your tube as new layer- If you used same tube as in tag above DO NOT RESIZE.
Pull element39 and 48 into psp
Copy & Paste element 39 as new layer and resize to 30%
Place at bottom in front of tube and mirror
Paste element 48 as new layer and resize to 25%
Place on element 39 but to the right just a bit
Pull elements 66 & 67 into psp
Paste element67 as new layer and resize to 25%
Place on bottom right side
Paste element 66 as new layer resize to 25% and place beside element67
Add your name using the Always Forever font size 26 FG Black BG dark red
Convert to raster and a small white gradientglow of 3.00
Merge all visble and save as png
Delete the copywrite
Jump up onto the raster7 layer
Pull element 73 into psp and paste as new layer
Resize to 75%
Add a dropshadow of 3 3 40 20 black Click ok
Repeat same dropshadow again
Move this layer below raster3 layer but above raster2 layer
Jump back upto your raster 7 layer
Pull frame3 into psp and paste
Resize to 85 % and line up with raster7
Pull element96 into psp and paste as new layer
Line in center of frame and resize to 75% Image Mirror realign
Use eraser to erase bottom of stalk
Pull element2 into psp and paste
Place on left side on black rectangle
Resize to 75%
On your layer palette move lantern layer below your bush layer
Pull paper12 into psp
Jump onto copy of raster layer 5 and with magicwand select it
Copy/Paste your paper as new layer and invert DO NOT DESELECT YET
Paste a image of a cityscene as new layer and hit delete Deselect
( I am using the city image from DEVILISHDEZIGNS PTU KIT CITY OF Despair)
(Buy CityofDespair HERE)
Repeat for copy2 of raster 6 layer
Pull element33 into psp and paste
Resize to 65% and place over on the left just a bit
Refer to my tag above for placement
Paste your tube as new layer- If you used same tube as in tag above DO NOT RESIZE.
Pull element39 and 48 into psp
Copy & Paste element 39 as new layer and resize to 30%
Place at bottom in front of tube and mirror
Paste element 48 as new layer and resize to 25%
Place on element 39 but to the right just a bit
Pull elements 66 & 67 into psp
Paste element67 as new layer and resize to 25%
Place on bottom right side
Paste element 66 as new layer resize to 25% and place beside element67
Add your name using the Always Forever font size 26 FG Black BG dark red
Convert to raster and a small white gradientglow of 3.00
Merge all visble and save as png
Thursday, October 25, 2012
Destiny of Winter

This tutorial is my creation & any resemblences to others is purely accidental
Written by ToxicTutorialz on 10.25.12 in PSPX2
Written by ToxicTutorialz on 10.25.12 in PSPX2
Any PSP version should work
Do Not Claim as Your own
Link Back to My Blog
Remember to SAVE Often!!!
PTU Kit called Almost Midnight by DevilishDezines
Buy it at SATC
PTU Tube by MrsHomerLynn
Buy it at Art
Plugins used Vanderlee/SnowScape & Snow Flakes
Font used called Janda Elegant Handwriting
Download at Fontspace.com
Buy it at SATC
PTU Tube by MrsHomerLynn
Buy it at Art
Plugins used Vanderlee/SnowScape & Snow Flakes
Font used called Janda Elegant Handwriting
Download at Fontspace.com
Begin with a 700 x 500 blank image
Pull element 51 55, 58 and 59 into psp
Paste E 55 as new layer and center it on your image
Resize if you like I left mine as is
Now paste E 59 as new layer
Place below E 55
Now paste Elements 51 and 58 as new layers
Resize to 55% and place around element 59 as shown in tag above
Jump onto your Wall Layer on layer palette which is E 55
Apply the Vanderlee plugin Snowscape with the following settings lsited below
25,25,10 top only,bright white click ok
Copy & Paste your tube as new layer Sitting tube looks best
Place in center and resize to 75%
Add other elements of your choice
I used elements 79, 98,99,100 from elements 2 folder and Elements 33& 39 from elements1 folder
Paste them as new ayers and resize as you like
Place them around your whole image as you like best or use my tag above for guidance
Add your copywrite and name
Jump onto your wall layer
Now add the plugin Vanderlee/Snow Flakes with the settings listed below
31,0,13,100,0,basic snow ,0 Click ok
Now apply once more on your tube layer but move the amount slider to 6
Merge all visible and save as png
Pull element 51 55, 58 and 59 into psp
Paste E 55 as new layer and center it on your image
Resize if you like I left mine as is
Now paste E 59 as new layer
Place below E 55
Now paste Elements 51 and 58 as new layers
Resize to 55% and place around element 59 as shown in tag above
Jump onto your Wall Layer on layer palette which is E 55
Apply the Vanderlee plugin Snowscape with the following settings lsited below
25,25,10 top only,bright white click ok
Copy & Paste your tube as new layer Sitting tube looks best
Place in center and resize to 75%
Add other elements of your choice
I used elements 79, 98,99,100 from elements 2 folder and Elements 33& 39 from elements1 folder
Paste them as new ayers and resize as you like
Place them around your whole image as you like best or use my tag above for guidance
Add your copywrite and name
Jump onto your wall layer
Now add the plugin Vanderlee/Snow Flakes with the settings listed below
31,0,13,100,0,basic snow ,0 Click ok
Now apply once more on your tube layer but move the amount slider to 6
Merge all visible and save as png
Sunday, October 21, 2012
WinterLust
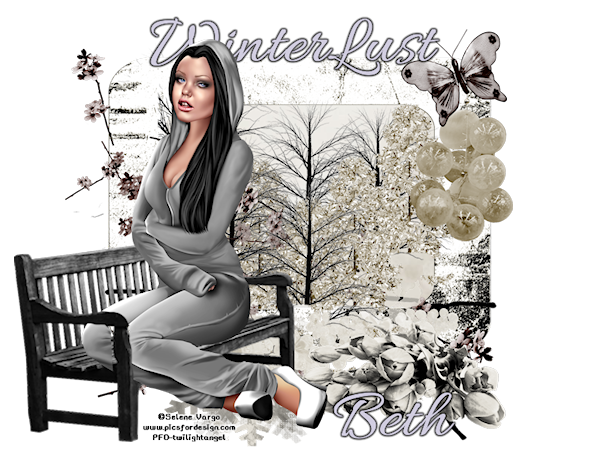
This tutorial is my creation & any resemblences to others is purely accidental
Written by ToxicTutorialz on 10.21.12 in PSPX2
Any PSP version should work
Do Not Claim as Your own
Link Back to My Blog
Remember to SAVE Often!!!
PTU Kit called Dreams of Yesterday by DevilishDezines
Buy it Here
PTU Tube called Paradise Kitty by Selene Vargo
Buy it only at PFD
Font Allura at dafont.com
Written by ToxicTutorialz on 10.21.12 in PSPX2
Any PSP version should work
Do Not Claim as Your own
Link Back to My Blog
Remember to SAVE Often!!!
PTU Kit called Dreams of Yesterday by DevilishDezines
Buy it Here
PTU Tube called Paradise Kitty by Selene Vargo
Buy it only at PFD
Font Allura at dafont.com
A sitting tube works best for this tutorial
Begin by opening a 800 x 600 blank image will resize at the end
Pull frame6 into psp and paste as new layer
Place in center and resize to 70%
Pull paper2 into psp and copy
Use magicwand to select center of frame
Selections Modify Expand by 4
Paste your paper as new layer Invert and Delete
Move paper below frame layer on layer palette
Pull Elements 1 5 and 13 into psp
Copy & paste element1 and resize to 35%
Place inside frame and use eraser to erase any overhang
Repeat for element5
Refer to my tag above for placements
Copy & Paste element13 as new layer
Resize to 55% and place at bottom on frame
Pull the following elements into psp
Element 17, 97, 39, 65 and 46
Copy & Paste element 17 and place at bottom
Resize to 75%
Repeat for element 97 and place on bottom right side
C/P element 65 as new layer Resize to 45%
Place on top right corner of frame
Paste element 39 as new layer
Resize to 45% Place on top right side below the butterfly
Now paste element 46
Resize to about 65%
Place on lower left side
Paste your tube as new layer
Resize to 65 to 70%
Place on bench
If using same tube as me Use eraser to erase pieces of her leg
Add your copywrite
Add your name using the Allura font or one of your choice
Size 22 BG #d1cde0 FG Null
Convert to raster layer
Add a small black gradient glow of 3.00
Merge all visible Resize all layers to 75% and Save
Pull frame6 into psp and paste as new layer
Place in center and resize to 70%
Pull paper2 into psp and copy
Use magicwand to select center of frame
Selections Modify Expand by 4
Paste your paper as new layer Invert and Delete
Move paper below frame layer on layer palette
Pull Elements 1 5 and 13 into psp
Copy & paste element1 and resize to 35%
Place inside frame and use eraser to erase any overhang
Repeat for element5
Refer to my tag above for placements
Copy & Paste element13 as new layer
Resize to 55% and place at bottom on frame
Pull the following elements into psp
Element 17, 97, 39, 65 and 46
Copy & Paste element 17 and place at bottom
Resize to 75%
Repeat for element 97 and place on bottom right side
C/P element 65 as new layer Resize to 45%
Place on top right corner of frame
Paste element 39 as new layer
Resize to 45% Place on top right side below the butterfly
Now paste element 46
Resize to about 65%
Place on lower left side
Paste your tube as new layer
Resize to 65 to 70%
Place on bench
If using same tube as me Use eraser to erase pieces of her leg
Add your copywrite
Add your name using the Allura font or one of your choice
Size 22 BG #d1cde0 FG Null
Convert to raster layer
Add a small black gradient glow of 3.00
Merge all visible Resize all layers to 75% and Save
Wednesday, October 17, 2012
Lost in the BluSea

This tutorial is my creation & any resemblences to others is purely accidental
Written by ToxicTutorialz on 10.15.12 in PSPX2
Any PSP version should work
Do Not Claim as Your own
Link Back to My Blog
Remember to SAVE Often!!!
PTU Kit called BlueLace by DevilishDezines
PTU Tube by ChristineKotlark
Buy it at SATC- HERE
Font Allura
dafont.com
AnimationShop
Written by ToxicTutorialz on 10.15.12 in PSPX2
Any PSP version should work
Do Not Claim as Your own
Link Back to My Blog
Remember to SAVE Often!!!
PTU Kit called BlueLace by DevilishDezines
PTU Tube by ChristineKotlark
Buy it at SATC- HERE
Font Allura
dafont.com
AnimationShop
Pull frame3 into psp
Resize to 85%
Pull paper3 into psp
Select center of frame using magicwand
Selections Modify Expand by 5
Copy & Paste the paper as new layer
Selections Invert Delete DO NOT DESELECT
Pull element13 into psp
Copy & Paste as new layer inside frame
Position the way you like and Hit Delete DO NOT DESELECT YET!!
Pull element49 into psp and paste as new layer inside frame
Hit Delete as before Now Deselect
Move paper,bubbles and fish layers below frame layer
Make sure you fish layer is above your bubbles layer
C&p the tube as new layer and resize to 75%
Place at bottom in center
Pull elements 10 and 22 into psp
C&P element10 as new layer
Resize to 55% and place at bottom as seen in tag above
Now paste element22 as new layer and repeat steps above
Keep repeating til you are happy with it
Pull element 20 into psp Resize to 55%
Place on the bottom left side on frame
Pull element 41 into psp and resize to 40%
Place at bottom in front of other elements
Now start adding other elements you may like that goes great with the image
I added Elements 6, 8, 27,,47, 48, 53 and 69
Resize as necessary and place your whole image as you like
I placed the life preserver on the right side and resized to 45%
I then placed the lizard on the life preserver
If you used element 53 place it on the upper left side on frame and resize to 45%
Add your copywrite and name
Close off all layers except your paper,bubbles and fish layers
Right Click on the top blue aprt of your image and copymerged
Paste into Animationshop as NEW ANIMATION
Go to effects Insert Image Effect & Apply the UnderWater Effect as seen below
Resize to 85%
Pull paper3 into psp
Select center of frame using magicwand
Selections Modify Expand by 5
Copy & Paste the paper as new layer
Selections Invert Delete DO NOT DESELECT
Pull element13 into psp
Copy & Paste as new layer inside frame
Position the way you like and Hit Delete DO NOT DESELECT YET!!
Pull element49 into psp and paste as new layer inside frame
Hit Delete as before Now Deselect
Move paper,bubbles and fish layers below frame layer
Make sure you fish layer is above your bubbles layer
C&p the tube as new layer and resize to 75%
Place at bottom in center
Pull elements 10 and 22 into psp
C&P element10 as new layer
Resize to 55% and place at bottom as seen in tag above
Now paste element22 as new layer and repeat steps above
Keep repeating til you are happy with it
Pull element 20 into psp Resize to 55%
Place on the bottom left side on frame
Pull element 41 into psp and resize to 40%
Place at bottom in front of other elements
Now start adding other elements you may like that goes great with the image
I added Elements 6, 8, 27,,47, 48, 53 and 69
Resize as necessary and place your whole image as you like
I placed the life preserver on the right side and resized to 45%
I then placed the lizard on the life preserver
If you used element 53 place it on the upper left side on frame and resize to 45%
Add your copywrite and name
Close off all layers except your paper,bubbles and fish layers
Right Click on the top blue aprt of your image and copymerged
Paste into Animationshop as NEW ANIMATION
Go to effects Insert Image Effect & Apply the UnderWater Effect as seen below

Back to psp
Close off the bottom 3 layers which are the paper,bubbles and fish
Open the remaining layers from frame on up
Edit CopyMerged Paste into Animationshop as New ANIMATION
Ok now we have 17 frames of our underwater image
So make 17 frames of our framed image
Click the clipboard on the top toolbar in animationshop 17 times
Jump onto your underwater image tag
Edit Select All
Jump back onto your frame tag image
Edit Select All Copy
Jump back to your underwater tag image and Paste into selection
Don't let up on mouse til you have it aligned the way you like
Let go of mouse
Move your slider back to first frame
Highligh first frame and hit delete
Edit Select ALL Animation View and Save as gif
Monday, October 15, 2012
Bring Me Da Money
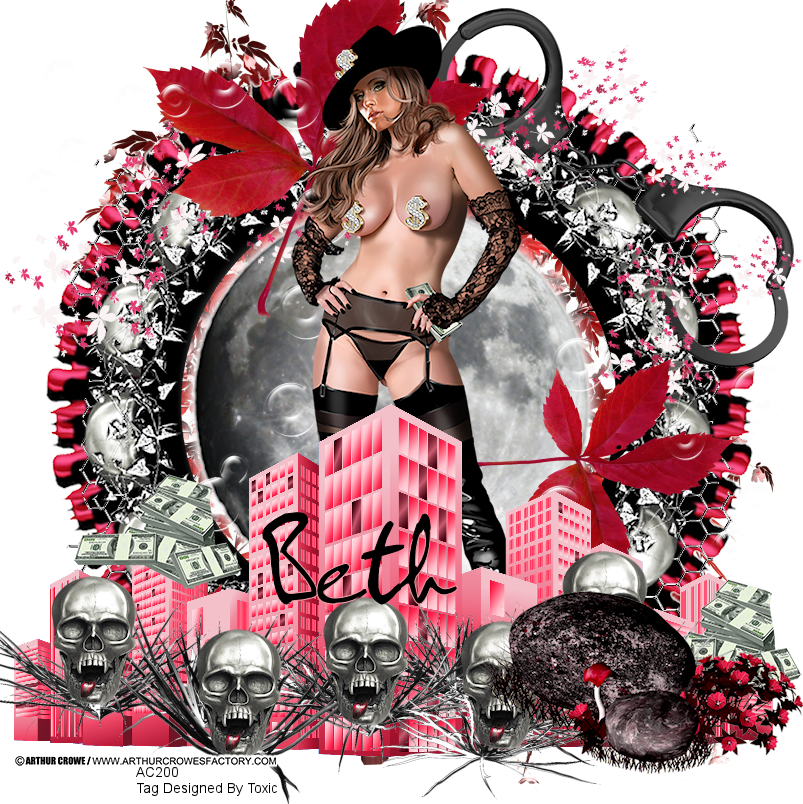
This tutorial is my creation & any resemblences to others is purely accidental
Written by ToxicTutorialz on 10.15.12 in PSPX2
Written by ToxicTutorialz on 10.15.12 in PSPX2
Any PSP version should work
Do Not Claim as Your own
Link Back to My Blog
Remember to SAVE Often!!!
Do Not Claim as Your own
Link Back to My Blog
Remember to SAVE Often!!!
PTU Kit called Dispair by DevilishDezines
Buy it Here
PTU Tube by Arthur Crowe
Buy it HERE
Font HarryPotter
fontspace.com
Buy it Here
PTU Tube by Arthur Crowe
Buy it HERE
Font HarryPotter
fontspace.com
Bring frames 3 and 8 into psp
Resize frame3 to 85% Paste frame8 as new layer Resize to 80%
Make sure frame 8 is on top of frame 3
Bring element45 into psp and paste as new layer
Resize to 75% Place in center of frames
Move this layer below frame layers
Bring element49 into psp
Select center of both frames with magicwand
C/P the moon as new layer and resize to 55% Place in center and deselect
Set blendmode on moon layer to luminance(l)
Bring element71 into psp
Paste as new layer resize if you like
Bring elements 44,46 and 73 into psp
C/P element73 and resize to 55% Place on top right side on frames
Paste element44 as new layer and place at the bottom of frames
Resize if you like
Now paste element46 and resize to 45% Place on bottom left side near the skulls
Bring element2 into psp
Paste and place at the bottom
Move this layer below your skulls layer
Lastly c/p your tube,if you used the same tube as me also paste the money image
Place the tube in center of frames
On layer palette move your tube layer below the cityimage and skulls layers
add your copywrite and name and merge all visible
Sunday, October 14, 2012
Beat of the Music
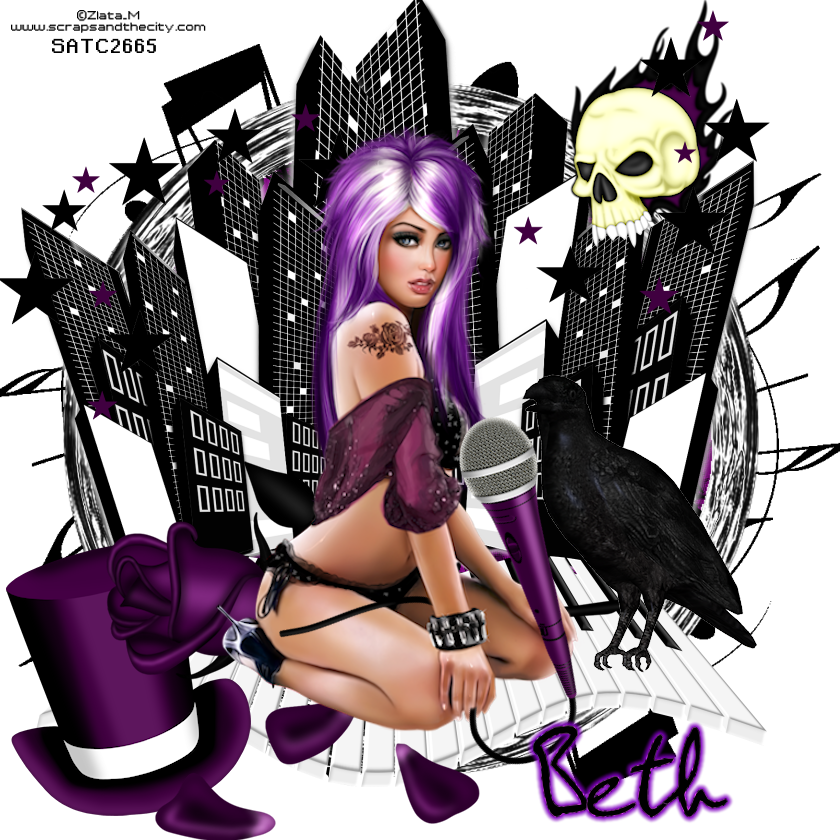
This tutorial is my creation & any resemblences to others is purely accidental
Written by ToxicTutorialz on 10.14.12 in PSPX2
Any PSP version should work
Do Not Claim as Your own
Link Back to My Blog
Remember to SAVE Often!!!
Written by ToxicTutorialz on 10.14.12 in PSPX2
Any PSP version should work
Do Not Claim as Your own
Link Back to My Blog
Remember to SAVE Often!!!
PTU Tube by ZlataM
Buy it at SATC
Buy it at SATC
Font used John Lennon
Download at fontspace.com
Download at fontspace.com
Pull frame4 & paper3 into psp
Select center of frame with magicwand
C/P paper3 as new layer Selections Invert Delete
Move below your frame layer
Bring element71 into psp
C/P as new layer
Move to the bottom just a little
Move this layer behind frame and paper layers
Duplicate and flip bring to the top and pull out just a little
Bring element1 & element30 into psp
Copy/Paste element30 as new layer
Place on frame toward the top
Now paste element1 as new layer
Place toward the top on the city image
Bring elements 7 and 22 into psp
C/P element 7 as a new layer & resize to 65 to 70%
Place at bottom of frame
Paste element22 and resize to 55% and place on keyboard
Now paste your tube as new layer Resize to 65% Place on keyboard and mirror
See my tag above
Bring the remaining elements into psp
Element 13,31,39 and 93
C/P element 13 as new layer
Resize to 45% and position on right top side of cityimage
C/P element39 as new layer Resize to 50% Place at the bottom right side on keyboard
Paste element 31 as a new layer and resize to 40%
Place on bottom left side below keyboard
Paste your remaining element and resize to 35%
Place in front of your tube and use pick tool to turn so that the mic is facing up
Use my tag above for reference
Select center of frame with magicwand
C/P paper3 as new layer Selections Invert Delete
Move below your frame layer
Bring element71 into psp
C/P as new layer
Move to the bottom just a little
Move this layer behind frame and paper layers
Duplicate and flip bring to the top and pull out just a little
Bring element1 & element30 into psp
Copy/Paste element30 as new layer
Place on frame toward the top
Now paste element1 as new layer
Place toward the top on the city image
Bring elements 7 and 22 into psp
C/P element 7 as a new layer & resize to 65 to 70%
Place at bottom of frame
Paste element22 and resize to 55% and place on keyboard
Now paste your tube as new layer Resize to 65% Place on keyboard and mirror
See my tag above
Bring the remaining elements into psp
Element 13,31,39 and 93
C/P element 13 as new layer
Resize to 45% and position on right top side of cityimage
C/P element39 as new layer Resize to 50% Place at the bottom right side on keyboard
Paste element 31 as a new layer and resize to 40%
Place on bottom left side below keyboard
Paste your remaining element and resize to 35%
Place in front of your tube and use pick tool to turn so that the mic is facing up
Use my tag above for reference
Saturday, October 13, 2012
Witches Brew
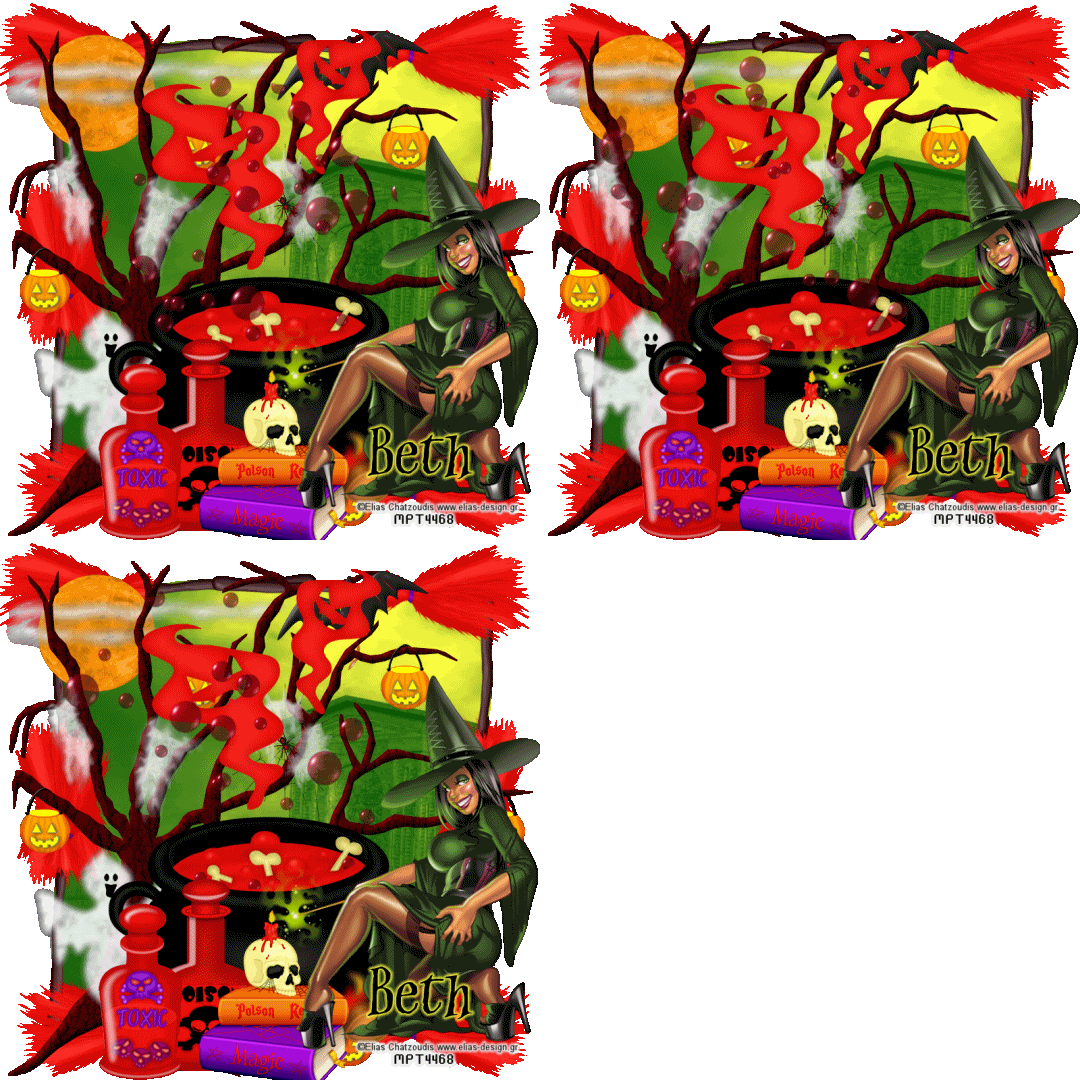
This tutorial is my creation & any resemblences to others is purely accidental
Written by ToxicTutorialz on 10.13.12 in PSPX2
Any PSP version should work
Do Not Claim as Your own
Link Back to My Blog
Remember to SAVE Often!!!
Do Not Claim as Your own
Link Back to My Blog
Remember to SAVE Often!!!
PTU Tube by Elias Chatzoudis
This is a very old tube that I bought at MPT when Elias was there
You can now purchase his tubes thru his site HERE
This is a very old tube that I bought at MPT when Elias was there
You can now purchase his tubes thru his site HERE
Any font you may you like
I used WitchesMagic
I used WitchesMagic
AnimationShop
Let's start by opening a 800 x 800 blank canvas ( resize later)
Pull broom from kit into psp
C/P as new layer onto canvas & resize to 55%
Use picktool to turn sideways
Place at top and duplicate Image mirror
Merge these 2 layers down
Duplicate and flip
Duplicate and rotate left by 90 and duplicate once more and mirror
You should end up with a frame like the one below
Pull broom from kit into psp
C/P as new layer onto canvas & resize to 55%
Use picktool to turn sideways
Place at top and duplicate Image mirror
Merge these 2 layers down
Duplicate and flip
Duplicate and rotate left by 90 and duplicate once more and mirror
You should end up with a frame like the one below
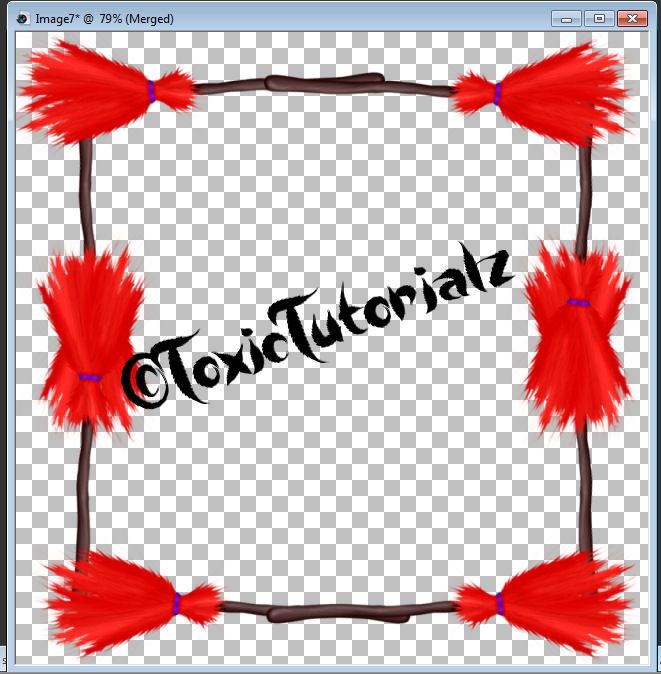
Merge all visible
Pull paper of choice into psp I am using paper8
Select center of frame with magicwand
Selections Modify Expand by 15
C/P the paper as a new layer Invert Delete Deselect
Move paper layer below frame layer
Pull element41 into psp and paste
Place on left side on frame
Pull element15 into psp and paste
Resize to 85% and place at bottom in center of frame
Now c/p your tube as new layer and place on right side at bottom
Pull elements 6, 30 and 55 into psp
Paste them as new layers and resize between 35 and 40%
Position them around the bottom of your canvas as seen in my tag above
Add your copywrite and name
Jump up to your cauldron layer
Add new layer
Grab your freehand selection tool to make a selection as seen in tag below
Pull paper of choice into psp I am using paper8
Select center of frame with magicwand
Selections Modify Expand by 15
C/P the paper as a new layer Invert Delete Deselect
Move paper layer below frame layer
Pull element41 into psp and paste
Place on left side on frame
Pull element15 into psp and paste
Resize to 85% and place at bottom in center of frame
Now c/p your tube as new layer and place on right side at bottom
Pull elements 6, 30 and 55 into psp
Paste them as new layers and resize between 35 and 40%
Position them around the bottom of your canvas as seen in my tag above
Add your copywrite and name
Jump up to your cauldron layer
Add new layer
Grab your freehand selection tool to make a selection as seen in tag below
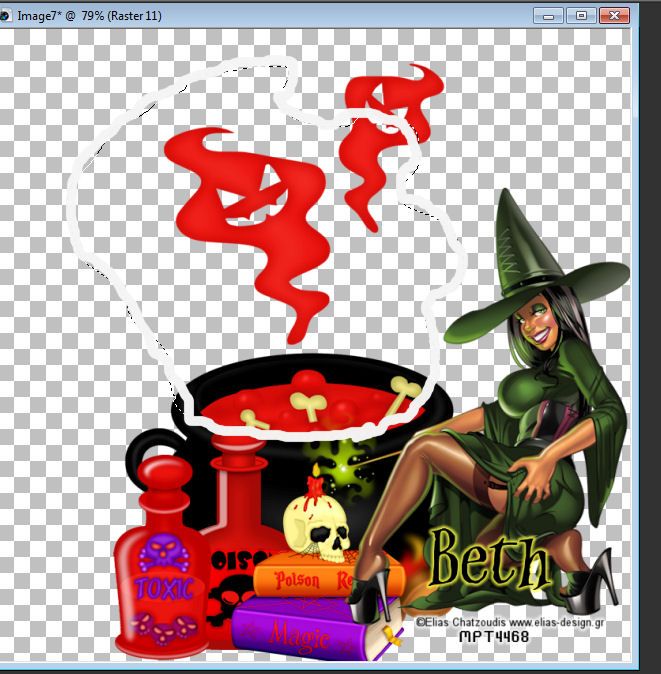
Effects Artist Effects/Balls&Bubbles and Apply with settings seen in tag below
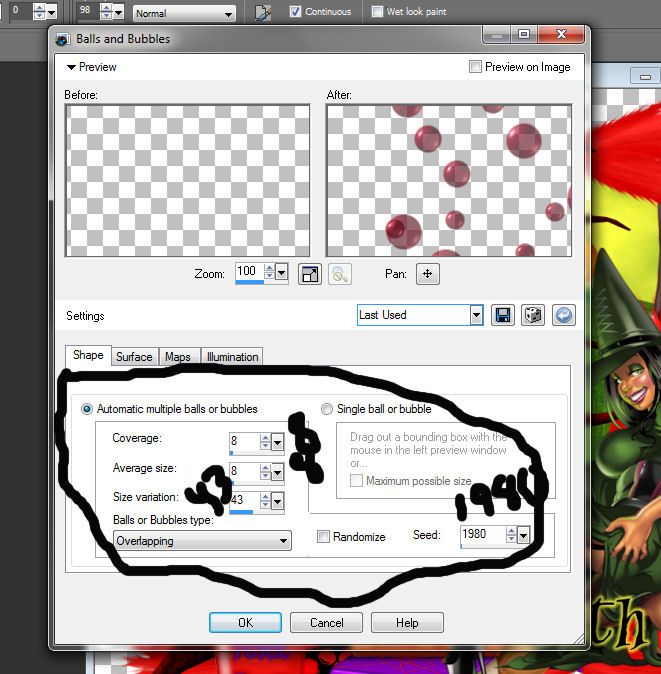
Deselect Edit CopyMerged Open Animationshop
Paste as new animation
Back to psp
Hit undo twice
Reapply Balls & Bubbles effect but this time change seed to 1984
Deselect
Edit Copymerged Back to Animationshop Paste after currentframe
Back to psp Hit undo twice Reapply same effect but this time seed set on 1991
Deselect Edit CopyMerged Back to Animationshop and paste after currentframe
In Animationshop Edit SelectAll FrameProperties Set speed to 70
Aniamtion Resize Animation to 540 540
View your animation and save as gif
Puff Puff Pass

This tutorial is my creation & any resemblences to others is purely accidental
Written by ToxicTutorialz on 10.13.12 in PSPX2
Any PSP version should work
Do Not Claim as Your own
Link Back to My Blog
Remember to SAVE Often!!!
PTU Tube WeedGirl by Celinart
Buy it at SATC
Buy it at SATC
Font used Cannabis
Download it at fontspace.com
Download it at fontspace.com
TBT_CMCMC_Mask2-Sorry I don't remember where I got this mask-If it is yours please email me
@ bethbarnes02@gmail.com and I will credit you
@ bethbarnes02@gmail.com and I will credit you
Pull frame into psp
Resize to 90%
Magicwand Select center of frame
Pull wire into psp and paste as new layer
Selections Invert Delete Deselect
Pull glitter into psp & paste as new layer
Move glitter & wire layers below frame layer
Pull nailpolish into psp & paste
Place at the top left side on frame
C/P your tube as new layer
Place on frame Resize to 45%
Use eraser to erase bottom overhang
On layer palette Move the glitter below all layers & the wire frame above the glitter layer
Now move your tube layer below wire but above glitter layer
Pull paper1 into psp and paste Make sure it is at the bottom on layer palette
Apply your mask of choice
Right click on mask layer and merge group
Pull sparkles into psp and paste
Duplicate and rotate by 90 left Place where you like
C/P your tube once more
Resize to 40% then again to 55%
Place over on right bottom side just a little
Pull elements of choice into psp
I used lips2, leaf3, bag2, leaf , hat, & tag
Place them around your tag as you like best
Jump back up to your 1st tube layer inside frame and change blend mode to Luminance (L)
Add your copywrite
Set font on sweetleaf size 28 BG on paper4 FG on black
Type out your name Convert to raster Place where you like best
Resize to 85% and add a small white gradient glow of 3.00
Merge all visible and save
Resize to 90%
Magicwand Select center of frame
Pull wire into psp and paste as new layer
Selections Invert Delete Deselect
Pull glitter into psp & paste as new layer
Move glitter & wire layers below frame layer
Pull nailpolish into psp & paste
Place at the top left side on frame
C/P your tube as new layer
Place on frame Resize to 45%
Use eraser to erase bottom overhang
On layer palette Move the glitter below all layers & the wire frame above the glitter layer
Now move your tube layer below wire but above glitter layer
Pull paper1 into psp and paste Make sure it is at the bottom on layer palette
Apply your mask of choice
Right click on mask layer and merge group
Pull sparkles into psp and paste
Duplicate and rotate by 90 left Place where you like
C/P your tube once more
Resize to 40% then again to 55%
Place over on right bottom side just a little
Pull elements of choice into psp
I used lips2, leaf3, bag2, leaf , hat, & tag
Place them around your tag as you like best
Jump back up to your 1st tube layer inside frame and change blend mode to Luminance (L)
Add your copywrite
Set font on sweetleaf size 28 BG on paper4 FG on black
Type out your name Convert to raster Place where you like best
Resize to 85% and add a small white gradient glow of 3.00
Merge all visible and save
HarvestPatch
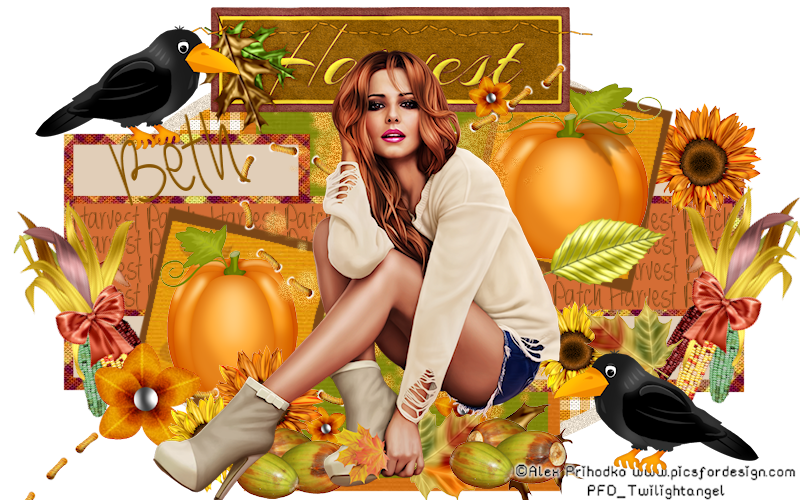
This tutorial is my creation & any resemblences to others is purely accidental
Written by ToxicTutorialz on 10.13.12 in PSPX2
Written by ToxicTutorialz on 10.13.12 in PSPX2
Any PSP version should work
Do Not Claim as Your own
Link Back to My Blog
Remember to SAVE Often!!!
Do Not Claim as Your own
Link Back to My Blog
Remember to SAVE Often!!!
PTU Tube by Alex Prihodko
buy it at PFD
buy it at PFD
Font called Always Forever or britany murphy
download at fontspace.com
download at fontspace.com
TT HarvestPatch Template Here
Open the template in psp & delete the watermark
Close off all layers except the bottom oval layer
Add a noise of 16 gaussian and monochrome ticked Ok
Open 2nd oval layer
Bring paper14 into psp
Magicwand to select oval C/P Paper as new layer Selections Invert Delete Deseelct
Jump on raster4 layer
Bring paper11 into psp and repeat as we did before
Keep repeating with all layers til you are happy with it
I left raster 5 ,7 and duplicate 7 as is
Once you are with the template
Copy & Paste your tube a snew layer and resize to 50%
Align in center of template
Let's start adding some elements
Bring PPT13 into psp
C/P as new layer and move below tube layer on layer palette
RESIZE TO 90%
Bring elements 33 & 34 into psp
C/P element 34 as new layer and resize to 40% Place on right side on square
Repeat for element 33 but resize to 35% and place on left side square
Bring the single leaves into psp and paste as new layers
Resize them between 20 and 25% Place them around your template as seen in my tag above
Bring PPT60 into psp and paste
Place behind tube
Bring PPT 70 into psp Paste as new layer Resize to 55% Place at top behind tube
Now just start adding elements you like and place around your template
Set your font on Always Forever size 26 BG on color from image
Type out your name Convert to raster and place where you like
Add your copywrite
Merge all visible and save
Close off all layers except the bottom oval layer
Add a noise of 16 gaussian and monochrome ticked Ok
Open 2nd oval layer
Bring paper14 into psp
Magicwand to select oval C/P Paper as new layer Selections Invert Delete Deseelct
Jump on raster4 layer
Bring paper11 into psp and repeat as we did before
Keep repeating with all layers til you are happy with it
I left raster 5 ,7 and duplicate 7 as is
Once you are with the template
Copy & Paste your tube a snew layer and resize to 50%
Align in center of template
Let's start adding some elements
Bring PPT13 into psp
C/P as new layer and move below tube layer on layer palette
RESIZE TO 90%
Bring elements 33 & 34 into psp
C/P element 34 as new layer and resize to 40% Place on right side on square
Repeat for element 33 but resize to 35% and place on left side square
Bring the single leaves into psp and paste as new layers
Resize them between 20 and 25% Place them around your template as seen in my tag above
Bring PPT60 into psp and paste
Place behind tube
Bring PPT 70 into psp Paste as new layer Resize to 55% Place at top behind tube
Now just start adding elements you like and place around your template
Set your font on Always Forever size 26 BG on color from image
Type out your name Convert to raster and place where you like
Add your copywrite
Merge all visible and save
Friday, October 12, 2012
Venomous Poison
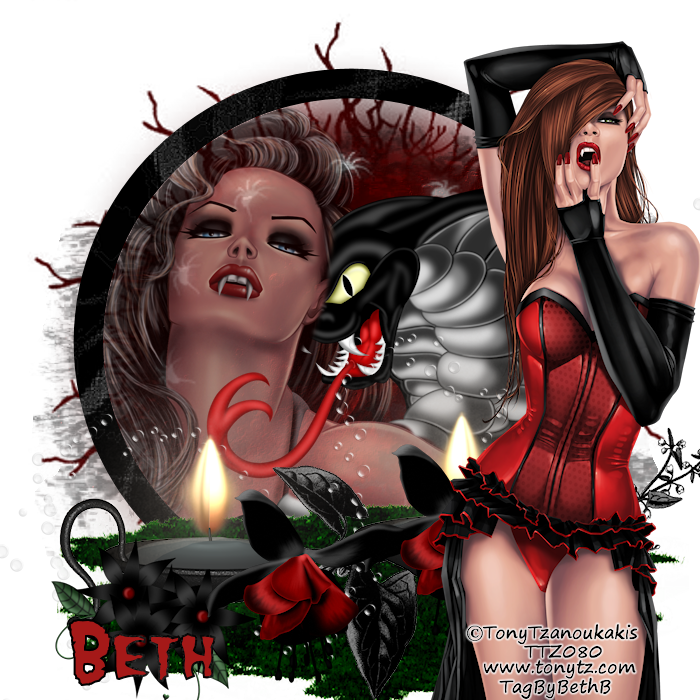
This tutorial is my creation & any resemblences to others is purely accidental
Written by ToxicTutorialz on 10.12.12 in PSPX2
Any PSP version should work
Do Not Claim as Your own
Link Back to My Blog
Remember to SAVE Often!!!
Written by ToxicTutorialz on 10.12.12 in PSPX2
Any PSP version should work
Do Not Claim as Your own
Link Back to My Blog
Remember to SAVE Often!!!
PTU Kit called Dark Secrets by DevilishDezines
2 PTU Tubes by TonyTzanoukakis Here
WSL_HalloweenMask2 Here
Start with a 700 x 700 blank canvas
Drag paper3 into psp and paste as new layer
Apply the mask2 from disk Click
Right click on mask layer & Merge Group
Drag paper12 into psp and set as your FG on material palette
BG on null
Preset shape set on ellipse width30
Draw out a circle just a little smaller then your mask layer
Convert to raster layer
Drag element38 into psp Paste as new layer
On layer palette move element38 below circle but above mask layers
Change the opacity to 50
Use magicwand to select center of circle
Copy & Paste one of your tubes as new layer inside circle
Align her on the left side
Selections Invert Delete DO NOT DESELECT!!
Bring element3 into psp and paste inside frame on right side as new layer
Resize to 65% Align the snake so thats its tongue is your tube's neck
Hit Delete and deselect
Now grab your eraser size 32 and erase parts of the face and body
See my tag above for reference
Now let's start adding other elements
Bring element85 into psp & paste as new layer
Move to bottom of canvas
Make sure this layer is above all layers on layer palette
Resize to 85%
Bring element80 into psp & paste
Resize to 60% and place at bottom on the right
Bring element68 into psp
Paste as new layer
Free Rotate by 90 left
Place at the bottom on grass
Bring element35 into psp Paste as new layer
Resize to 25% Place on the vine Duplicate and place also on the vine
Paste the 2nd tube as new layer I had to resize mine to 40%
Place on right side of frame at bottom
Bring element93 into psp
Paste and resize to 45% Place on bottom on left side
Duplicate Image Mirror
Now on the 1st tube inside frame set the opacity to 63
Add your copywrite
Font on Misfits size 20 BG dark red FG black
Type out your name Convert to raster
Merge all visible and save
Drag paper3 into psp and paste as new layer
Apply the mask2 from disk Click
Right click on mask layer & Merge Group
Drag paper12 into psp and set as your FG on material palette
BG on null
Preset shape set on ellipse width30
Draw out a circle just a little smaller then your mask layer
Convert to raster layer
Drag element38 into psp Paste as new layer
On layer palette move element38 below circle but above mask layers
Change the opacity to 50
Use magicwand to select center of circle
Copy & Paste one of your tubes as new layer inside circle
Align her on the left side
Selections Invert Delete DO NOT DESELECT!!
Bring element3 into psp and paste inside frame on right side as new layer
Resize to 65% Align the snake so thats its tongue is your tube's neck
Hit Delete and deselect
Now grab your eraser size 32 and erase parts of the face and body
See my tag above for reference
Now let's start adding other elements
Bring element85 into psp & paste as new layer
Move to bottom of canvas
Make sure this layer is above all layers on layer palette
Resize to 85%
Bring element80 into psp & paste
Resize to 60% and place at bottom on the right
Bring element68 into psp
Paste as new layer
Free Rotate by 90 left
Place at the bottom on grass
Bring element35 into psp Paste as new layer
Resize to 25% Place on the vine Duplicate and place also on the vine
Paste the 2nd tube as new layer I had to resize mine to 40%
Place on right side of frame at bottom
Bring element93 into psp
Paste and resize to 45% Place on bottom on left side
Duplicate Image Mirror
Now on the 1st tube inside frame set the opacity to 63
Add your copywrite
Font on Misfits size 20 BG dark red FG black
Type out your name Convert to raster
Merge all visible and save
Thursday, October 11, 2012
Devil from HELL
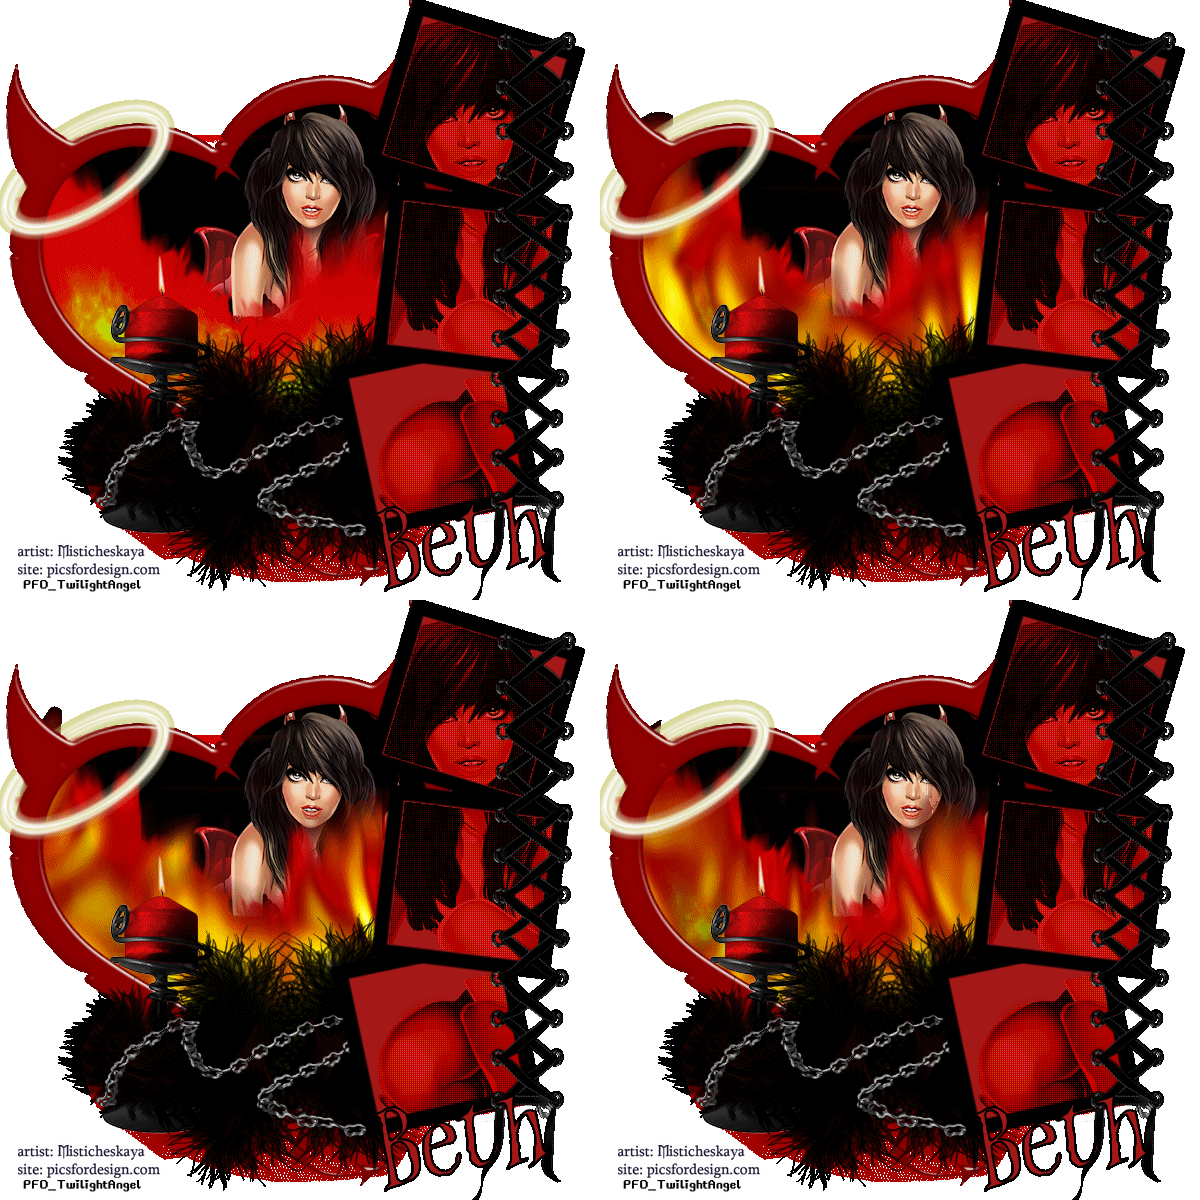
This tutorial is my creation & any resemblences to others is purely accidental
Written by ToxicTutorialz on 10.11.12 in PSPX2
Written by ToxicTutorialz on 10.11.12 in PSPX2
Any PSP version should work
Do Not Claim as Your own
Link Back to My Blog
Remember to SAVE Often!!!
Do Not Claim as Your own
Link Back to My Blog
Remember to SAVE Often!!!
PTU KIt called Angel or Devil (Red) by AddictivePleasures
DevilTube by LadyMishka Buy it at PFD
AnimationShop
Eyecandy4/fire
Font called WitchesMagic from fontspace.com
Start with a 600 x 600 blank image
Set presetshape to rectangle width15
Background on #a51918 Foreground on #000000
Draw out a med size rectangle
Convert to raster
Use picktool to push up on control arm
Place on right side
Duplicate Place below the top rectangle
Duplicate and place below the middle rectangle
Line them up the way you like
Drag laceup into psp and paste as new layer
Place on far right side on all 3 frames
Use magicwand to select center of all 3 frames
Copy/Paste your tube as new layer
Selections Invert Delete Deselect
Apply a texture of choice I used penta.com / colordot
Duplicate your tube layer
On original change the blendmode to burn
On duplicate change blendmode to soft light
Drag frame4 into psp and paste onto image as new layer
Grab magicwand again and select center of frame
Selections Modify Expand by 3 Add new layer
Floodfill with black DO NOT DESELECT YET!!!
Drag fire into psp and paste as new layer
Line up inside frame at bottom Selections Invert Delete
Duplicate your fire Image Mirror Line up on left side
Erase any outside overhang
Magicwand once again selecting inside frame
C/P tube as new layer Resize to 65% Align the way you like best
Selections Invert Delete Deselect
Move tube layer below frame and fire layers on alyer pallete
Drag halo into psp
Copy/Paste as new layer Place on the horn as seen in tag above
Erase bits of the halo so that its wrapped around horn
Drag netting into psp and paste
Place at bottom of devilframe
Move below the frame and fire layers on layer palette
Drag feathers and chain into psp
Paste feathers as new layer and place on bottom of frame
Duplicate feathers and place to the right just a bit
Now paste the chain
See my tag above for placement
Drag candle into psp and paste
Resize to 65% and place on the bottom left side
Place your feather and chain over the candle as seen in my tag above
Add your copywrite
Add your name using the font witchesmagic size 20 stroke2
Jump back on your fire layers and merge down
Edit CopyMerged
Open Animationshop and paste as new animation
Back to psp
On fire layers Selections Select All Float Defloat
Effects Plugins EC4/Fire with the below settings
Set presetshape to rectangle width15
Background on #a51918 Foreground on #000000
Draw out a med size rectangle
Convert to raster
Use picktool to push up on control arm
Place on right side
Duplicate Place below the top rectangle
Duplicate and place below the middle rectangle
Line them up the way you like
Drag laceup into psp and paste as new layer
Place on far right side on all 3 frames
Use magicwand to select center of all 3 frames
Copy/Paste your tube as new layer
Selections Invert Delete Deselect
Apply a texture of choice I used penta.com / colordot
Duplicate your tube layer
On original change the blendmode to burn
On duplicate change blendmode to soft light
Drag frame4 into psp and paste onto image as new layer
Grab magicwand again and select center of frame
Selections Modify Expand by 3 Add new layer
Floodfill with black DO NOT DESELECT YET!!!
Drag fire into psp and paste as new layer
Line up inside frame at bottom Selections Invert Delete
Duplicate your fire Image Mirror Line up on left side
Erase any outside overhang
Magicwand once again selecting inside frame
C/P tube as new layer Resize to 65% Align the way you like best
Selections Invert Delete Deselect
Move tube layer below frame and fire layers on alyer pallete
Drag halo into psp
Copy/Paste as new layer Place on the horn as seen in tag above
Erase bits of the halo so that its wrapped around horn
Drag netting into psp and paste
Place at bottom of devilframe
Move below the frame and fire layers on layer palette
Drag feathers and chain into psp
Paste feathers as new layer and place on bottom of frame
Duplicate feathers and place to the right just a bit
Now paste the chain
See my tag above for placement
Drag candle into psp and paste
Resize to 65% and place on the bottom left side
Place your feather and chain over the candle as seen in my tag above
Add your copywrite
Add your name using the font witchesmagic size 20 stroke2
Jump back on your fire layers and merge down
Edit CopyMerged
Open Animationshop and paste as new animation
Back to psp
On fire layers Selections Select All Float Defloat
Effects Plugins EC4/Fire with the below settings
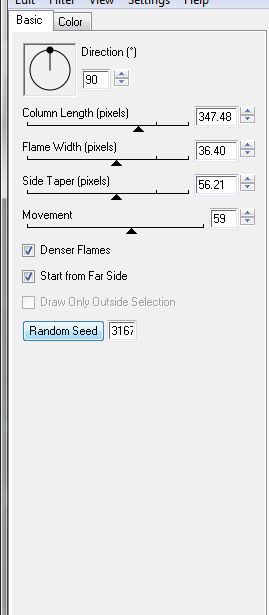
Deselect
Edit CopyMerged Paste into Animationshop after currentframe
Back to psp
Hit Undo twice
Reapply the fire plugin except hit seed twice
Deselect
Paste in animationshop after current frame
Back to psp again
Hit undo twice
Reapply same plugin once more hitting random seed twice
Deselect
Paste in animationshop once again after currentframe
Edit Select All Animation Frame Properties Set speed to 45
View your animation and save.

Wednesday, October 10, 2012
Rapture Me
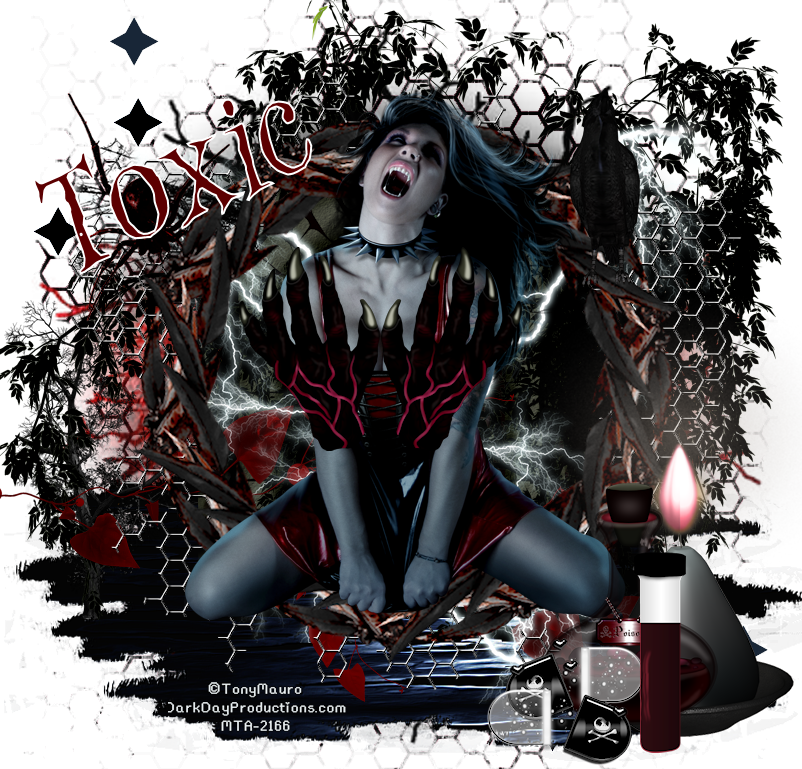
This tutorial is my creation & any resemblences to others is purely accidental
Written by ToxicTutorialz on 10.10.12 in PSPX2
Written by ToxicTutorialz on 10.10.12 in PSPX2
Any PSP version should work
Do Not Claim as Your own
Link Back to My Blog
Remember to SAVE Often!!!
Link Back to My Blog
Remember to SAVE Often!!!
This tut requires alot of patience and elements so be prepared..
PTU Tube by Tony Mauro
You can purchase his tubes at MTA
You can purchase his tubes at MTA
Font called WitchesMagic
Download it at fontspace.com
Download it at fontspace.com
Mask2 by WSL Here
Drag frame2 into psp
Resize to 85%\
Drag paper1 into psp
Add new layer
Move below your frame layer
Magicwand and click outside of frame
Click your bottom layer
Paste your paper as new layer
Apply your mask2 from disk
Deselect
Drag element100 into psp & paste
Drag below your mask and frame layers
Drag element77 into psp
Paste as new layer and drag below mask,frame layers but above wire layer
Drag element49 into psp and paste
Place at bottom of canvas
On your layer palette drag above the mask layer but below the frame
Paste your tube as new layer
Position inside the frame but on layer palette drag above your frame layer
See tag above for placement
Drag element12 into psp
Resize to 25%
Copy/Paste onto canvas as new layer
Position on frame branch on right side
Drag element8 into psp and paste
Resize to 50%
Position in frame
Move below frame layer on layer palette
Drag elements 38,13, and 92 into psp
Paste element 13 as new layer
Resize to 45% and place on bottom left side
Paste element38 as new layer
Image Mirror and place on right side behind all
Drag element 20 into psp and paste
Place inside frame and resize to 45%
DUPLICATE AND MIRROR
Duplicate and flip
Paste element92 as new layer
Resize to 50% and place on tube close to her neck
Add other elements you like
Add your copywrite
Set font on WitchesMagic size 26 B=bold Stroke2
BG ona color from tube FG on white
Type out your name Convert to raster layer
Merge all visible and save as png
Resize to 85%\
Drag paper1 into psp
Add new layer
Move below your frame layer
Magicwand and click outside of frame
Click your bottom layer
Paste your paper as new layer
Apply your mask2 from disk
Deselect
Drag element100 into psp & paste
Drag below your mask and frame layers
Drag element77 into psp
Paste as new layer and drag below mask,frame layers but above wire layer
Drag element49 into psp and paste
Place at bottom of canvas
On your layer palette drag above the mask layer but below the frame
Paste your tube as new layer
Position inside the frame but on layer palette drag above your frame layer
See tag above for placement
Drag element12 into psp
Resize to 25%
Copy/Paste onto canvas as new layer
Position on frame branch on right side
Drag element8 into psp and paste
Resize to 50%
Position in frame
Move below frame layer on layer palette
Drag elements 38,13, and 92 into psp
Paste element 13 as new layer
Resize to 45% and place on bottom left side
Paste element38 as new layer
Image Mirror and place on right side behind all
Drag element 20 into psp and paste
Place inside frame and resize to 45%
DUPLICATE AND MIRROR
Duplicate and flip
Paste element92 as new layer
Resize to 50% and place on tube close to her neck
Add other elements you like
Add your copywrite
Set font on WitchesMagic size 26 B=bold Stroke2
BG ona color from tube FG on white
Type out your name Convert to raster layer
Merge all visible and save as png
Wednesday, October 3, 2012
Tag
Made this tag using a FTU Halloween Collab Kit called HalloweenTreat by 3 wonderful designers.Grab these awesome ftu kits while it lasts and be sure to thank these awesome designers..

Tuesday, September 25, 2012
Coven of the Witch
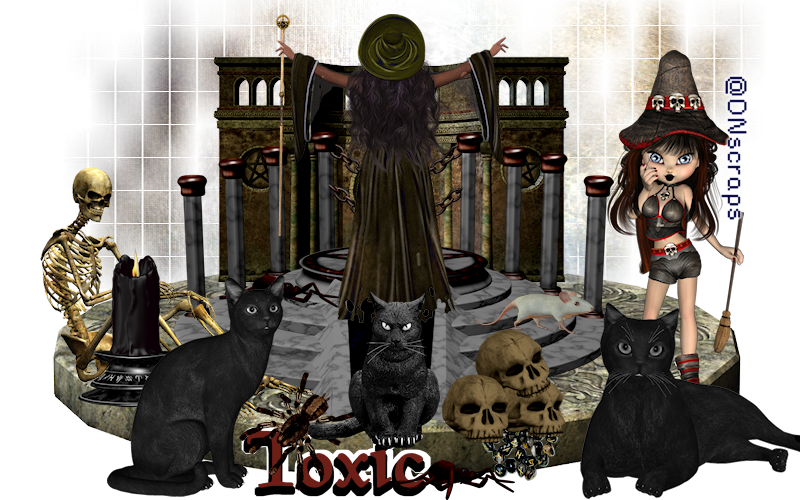
This tutorial is my creation & any resemblemces to others is purely accidental
Written by ToxicTutorialz on 9.25.12 in PSPX2
Any PSP version should work
Do Not Claim as Your own
Link Back to My Blog
Remember to SAVE Often!!!
Written by ToxicTutorialz on 9.25.12 in PSPX2
Any PSP version should work
Do Not Claim as Your own
Link Back to My Blog
Remember to SAVE Often!!!
PTU Kit called Season of the Witch by WitchysHeart
PTU Poser called WitcheryGirl by dnscraps
Font called Magic Medieval download at fontspace.comwww.fontspace.com
PTU Poser called WitcheryGirl by dnscraps
Font called Magic Medieval download at fontspace.comwww.fontspace.com
Open a 800 x 500 blank image
Bring MagicBall into psp
Copy & Paste as new layer and resize to 65%
Place in center of image
Bring Alter into psp and paste as new layer
Resize to 55% and move to bottom
Bring the pentagramstone2 into psp and paste
Resize to 90% Place at bottom below the alter
Bring pentagramwall into psp and paste
Resize to 45% and place behind the alter
On layer palette move the wall layer above the stone layer but below the alter layer
Bring witch3 into psp and paste
Resize to 40% and place on the alter
Bring runes,candle2 and skulls into psp
Copy/Paste the runes as new layer and resize to 20%
Place at bottom of the stone
Repeat for the canle but resize to 35% and place next to runes
Now paste the skulls and resize to 35% place on the stone above the runes
Now paste poser of choice or tube as new layer
Resize if neccessary
Place where you want her
Bring skeleton into psp and paste
Resize to 35% and place on left side on stone
Bring spiders and mouse2 into psp
C&P the mouse and resize all the way down to 15%
Place on altersteps
Repeat for spiders but place 1 on the edge of pentagram stone
and place the other below the stone on transparent image
Bring the blackcats into psp and paste
Resize each one between 35% and 40%
Place them at the bottom around the stone
Apply a mask of choice using paper3
Set your font on MagicMedieval size 20 stroke2
BG on #6d1f17 FG on Null
Type out your name and convert to raster
Place at bottom
Selections Select All Float Defloat Modify Expand by 4 Add New Layer
Floodfill with Black Move this layer below your red layer
Selections Modify Expand by 4 once more Add New Layer Floodfill with white
Move this layer below your black layer but above the red layer
Merge all visible and resize if you like
Save as png
Bring MagicBall into psp
Copy & Paste as new layer and resize to 65%
Place in center of image
Bring Alter into psp and paste as new layer
Resize to 55% and move to bottom
Bring the pentagramstone2 into psp and paste
Resize to 90% Place at bottom below the alter
Bring pentagramwall into psp and paste
Resize to 45% and place behind the alter
On layer palette move the wall layer above the stone layer but below the alter layer
Bring witch3 into psp and paste
Resize to 40% and place on the alter
Bring runes,candle2 and skulls into psp
Copy/Paste the runes as new layer and resize to 20%
Place at bottom of the stone
Repeat for the canle but resize to 35% and place next to runes
Now paste the skulls and resize to 35% place on the stone above the runes
Now paste poser of choice or tube as new layer
Resize if neccessary
Place where you want her
Bring skeleton into psp and paste
Resize to 35% and place on left side on stone
Bring spiders and mouse2 into psp
C&P the mouse and resize all the way down to 15%
Place on altersteps
Repeat for spiders but place 1 on the edge of pentagram stone
and place the other below the stone on transparent image
Bring the blackcats into psp and paste
Resize each one between 35% and 40%
Place them at the bottom around the stone
Apply a mask of choice using paper3
Set your font on MagicMedieval size 20 stroke2
BG on #6d1f17 FG on Null
Type out your name and convert to raster
Place at bottom
Selections Select All Float Defloat Modify Expand by 4 Add New Layer
Floodfill with Black Move this layer below your red layer
Selections Modify Expand by 4 once more Add New Layer Floodfill with white
Move this layer below your black layer but above the red layer
Merge all visible and resize if you like
Save as png
Monday, September 24, 2012
Got Blood
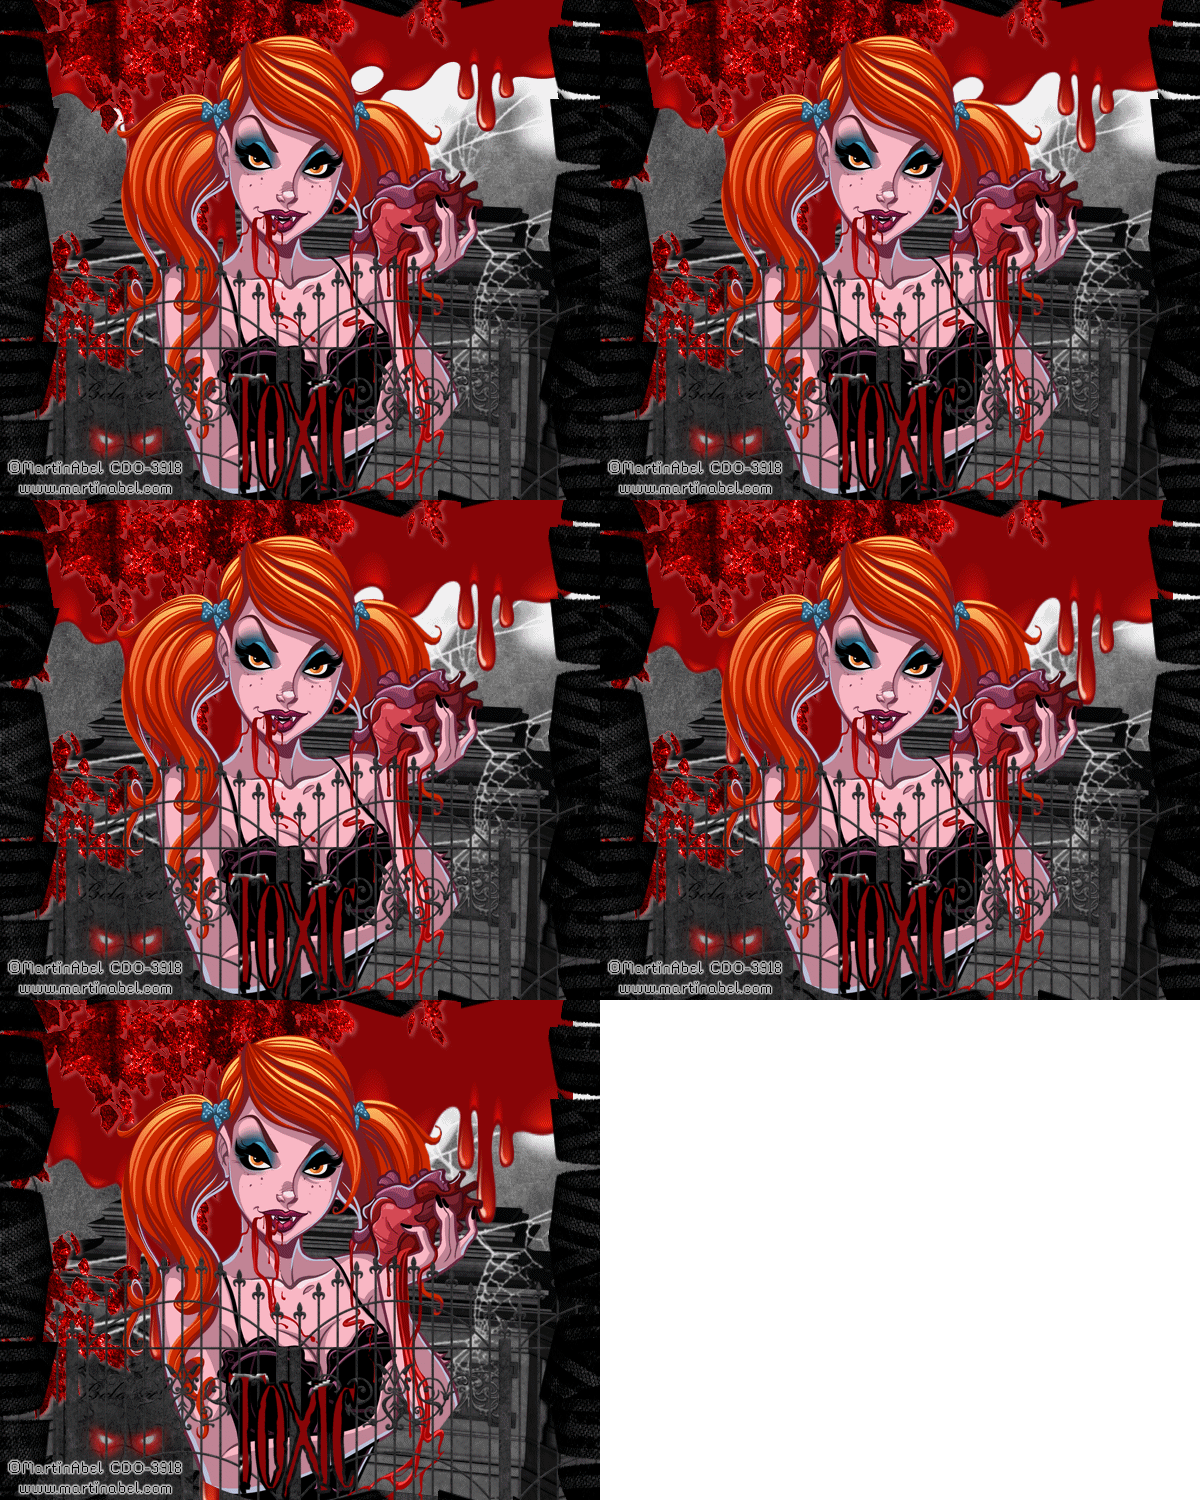
This tutorial is my creation & any resemblemces to others is purely accidental
Written by ToxicTutorialz on 9.24.12 in PSPX2
Any PSP version should work
Written by ToxicTutorialz on 9.24.12 in PSPX2
Any PSP version should work
Do Not Claim as Your own
Link Back to My Blog
Remember to SAVE Often!!!
PTU Kit used Vamp by AddictivePleasures
PTU Tube Got-Blood by MartinAbel
Purchase it at CDO
Font NightMare S
Download at dafont.com
AnimationShop
Plugins MM/CLOUD Xenofex2/RIP OPEN
Link Back to My Blog
Remember to SAVE Often!!!
PTU Kit used Vamp by AddictivePleasures
PTU Tube Got-Blood by MartinAbel
Purchase it at CDO
Font NightMare S
Download at dafont.com
AnimationShop
Plugins MM/CLOUD Xenofex2/RIP OPEN
Let's get started
Open a 600 x 500 blank image
Bring P5 into psp and paste onto image as new layer
Bring p11 into psp and paste as new layer
Effects Plugins Xeno2/RipOpen & Apply the settings listed below in image
Open a 600 x 500 blank image
Bring P5 into psp and paste onto image as new layer
Bring p11 into psp and paste as new layer
Effects Plugins Xeno2/RipOpen & Apply the settings listed below in image

Now go to adjust Hue & Sat Colorize & Move the slider all the way to the left
Bring fence into psp and paste as new layer
Move below your ripopen paper layer on layer palette
Bring leaves into psp and paste
Move to upper left corner and colorize to red
Bring moon into psp and paste
Move toward the top
Place in center behind leaves and fence
Bring coffin2 into psp and paste as new layer
Move coffin layer below fence layer but above moon layer
I also brought spiderweb, cloud, headstone, roses, lightpost, and blood3 into psp
Copy & Paste the cloud as new layer and place on right upper side of image
Now paste your remaining elements except the blood and place where you like best
Copy & Paste your blood as new layer and place at the top
Use pick tool to stretch it across the image
Now move this layer below your leaves layer but above the web, coffin layers
Paste your tube as new layer
If you used same tube as me make sure this layer is below fence layer but above your leaves and blood layers
Font on NightMare size 36 Stroke 3 BG #870608 FG Paper4
Type out your name Convert to raster
Add your copywrite
Edit CopyMerged Paste into AnimationShop as New Animation
Back to PSP
Hightlight your bloodlayer
Use picktool and pull down on bottom node
Edit CopyMerged Paste after currentframe in AnimationShop
Back to Psp and Repeat the picktool again
Edit CopyMerged Paste after currentframe in AnimationShop
Keep Repeating the above steps til you have 5 frames in AnimationShop
In AnimationShop
Edit SelectAll Aniamtion Frame Properties Set speed to 100
Highlight last frame and change speed to 110
Move the slider back to first frame
Edit Select All Animation View and save
Sunday, September 23, 2012
Demons n the Night
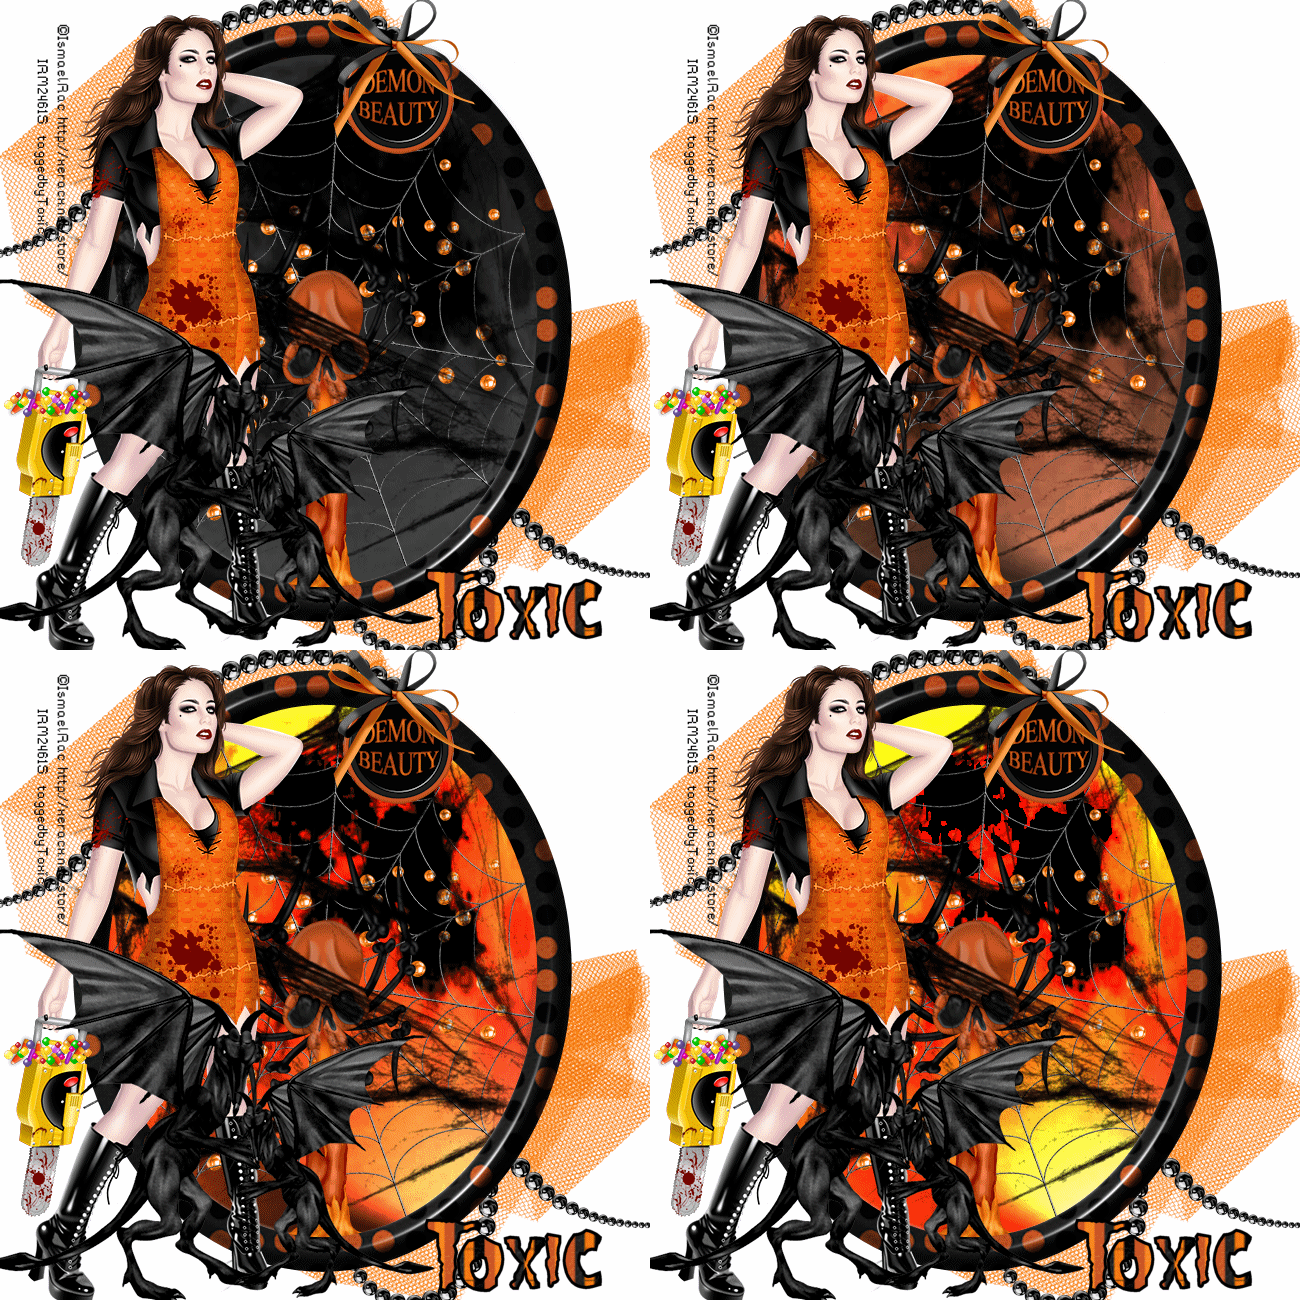
This tutorial is my creation & any resemblemces to others is purely accidental
Written by ToxicTutorialz on 9.23.12 in PSPX2
Any PSP version should work
Do Not Claim as Your own
Link Back to My Blog
Remember to SAVE Often!!!
PTU Kit used DemonBeauty by AddictivePleasures
PTU Tube used Devious by Ismael Rac /You may buy it here
Font used Misfits / download at fontspace.com
AnimationShop
PTU Tube used Devious by Ismael Rac /You may buy it here
Font used Misfits / download at fontspace.com
AnimationShop
Open a new image 650 x 650 transparent
Preset shape set on ellipse width36 FG on paper9 BG on Null
Draw out a large oval
Apply a bevelboss of choice
Pull web into psp
Copy/Paste as new layer Place inside frame toward the top
Duplicate web Image Mirror flip
Grab eraser size 25 and erase any overhang outside of frame on both web layers
Move weblayers below your frame layer
Pull moon into psp and paste as new layer inside frame
Use your picktool to stetch out from top to bottom and from left to right
Move below frame and web layers
Pull spiderweb into psp and paste inside frame
Make sure this layer is above moon but below webs and frame layers
Pull netting into psp and paste as new layer
Move netting layer below all layers and place in top left corner
Duplicate Image Flip and place in lower right corner
Pull beads2 into psp
C/P inside frame as new layer
Pull pearls into psp
Copy & Paste as new layer Place in top left corner
Move this layer below moon layer but above netting layers
Duplicate Image Mirror Flip and then flip again Position in bottom right corner
C&P your tube as new layer Position on the LEFT side of frame
Pull gargoyle into psp and paste as new layer on bottom right side
We want it to make it look as if he is grabbin your tube's leg
Place between her legs
Resize to 55% and duplicate Place on the outside of her right leg
Pull candle, bow4 and button into psp
C&P the button as new layer and resize to 45%
Place in the upper right side on frame
Repeat for the bow and place on button
Paste the candle as new layer and place at the bottom on right side
Add your copywrite
Pull paper11 into psp and set as BG FG on Black
Font on Misfits Size 24 Stroke3
Type out your name and convert to raster layer
Place on the bottom right side
Jump down to the very bottom layer and floodfill with white
Now comes the fun part
Open animation shop
Edit Copymerged and Paste into Animation Shop as New Animation
Back to PSP
Jump up onto your moon layer and apply
Effects Illumination Lights and apply the settings shown below
Preset shape set on ellipse width36 FG on paper9 BG on Null
Draw out a large oval
Apply a bevelboss of choice
Pull web into psp
Copy/Paste as new layer Place inside frame toward the top
Duplicate web Image Mirror flip
Grab eraser size 25 and erase any overhang outside of frame on both web layers
Move weblayers below your frame layer
Pull moon into psp and paste as new layer inside frame
Use your picktool to stetch out from top to bottom and from left to right
Move below frame and web layers
Pull spiderweb into psp and paste inside frame
Make sure this layer is above moon but below webs and frame layers
Pull netting into psp and paste as new layer
Move netting layer below all layers and place in top left corner
Duplicate Image Flip and place in lower right corner
Pull beads2 into psp
C/P inside frame as new layer
Pull pearls into psp
Copy & Paste as new layer Place in top left corner
Move this layer below moon layer but above netting layers
Duplicate Image Mirror Flip and then flip again Position in bottom right corner
C&P your tube as new layer Position on the LEFT side of frame
Pull gargoyle into psp and paste as new layer on bottom right side
We want it to make it look as if he is grabbin your tube's leg
Place between her legs
Resize to 55% and duplicate Place on the outside of her right leg
Pull candle, bow4 and button into psp
C&P the button as new layer and resize to 45%
Place in the upper right side on frame
Repeat for the bow and place on button
Paste the candle as new layer and place at the bottom on right side
Add your copywrite
Pull paper11 into psp and set as BG FG on Black
Font on Misfits Size 24 Stroke3
Type out your name and convert to raster layer
Place on the bottom right side
Jump down to the very bottom layer and floodfill with white
Now comes the fun part
Open animation shop
Edit Copymerged and Paste into Animation Shop as New Animation
Back to PSP
Jump up onto your moon layer and apply
Effects Illumination Lights and apply the settings shown below
insert image1
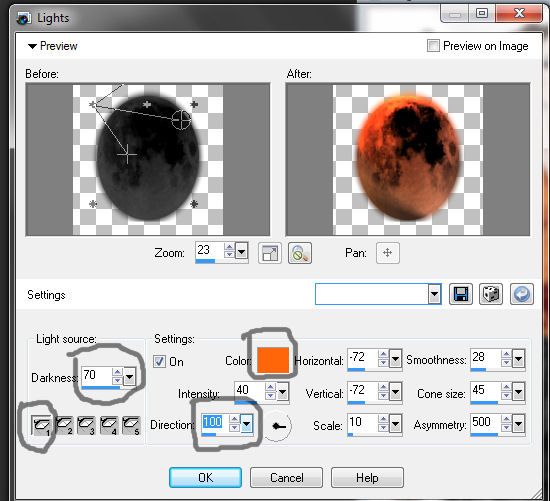
Edit CopyMerged Paste into Animation Shop after CurrentFrame
Back to PSP
Apply same effect as in image 2 below
Back to PSP
Apply same effect as in image 2 below
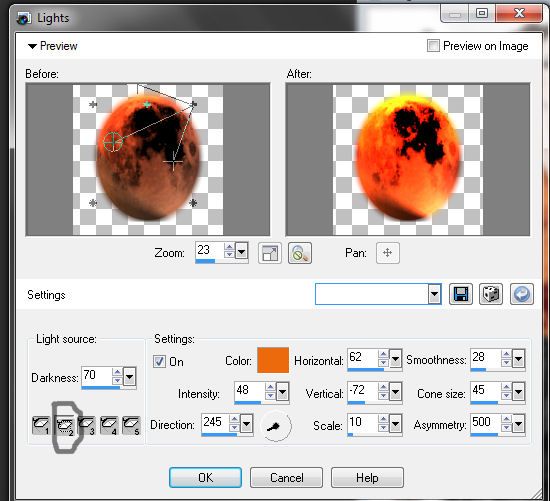
Edit CopyMerged Paste into Animation Shop after Currentframe
Back to PSP
Repeat same effect as seen in below image3
Back to PSP
Repeat same effect as seen in below image3
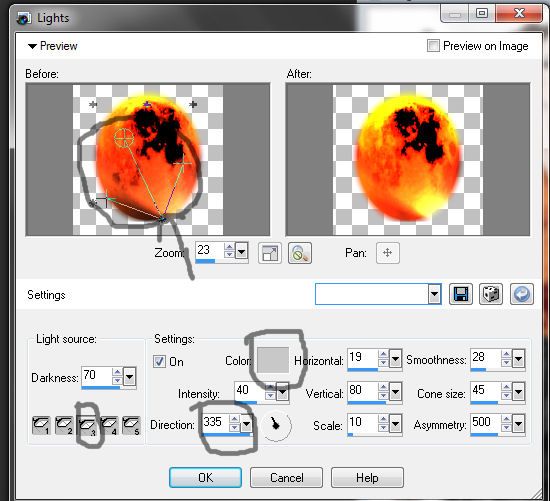
Paste into Animation Shop as before
Now in animationshop Edit Select All Animation Frame Properties
Set speed to 40 View Animation and Save
Now in animationshop Edit Select All Animation Frame Properties
Set speed to 40 View Animation and Save
Subscribe to:
Posts (Atom)
LinkWithin

About Me

Grab My Blinkies


I CT for


Script Tester 4

My Stalker Hits

Blogs I stalk

